Getting Started Guide: Documents Plugin for Autodesk®
Objective
To learn how to get started using the Procore Documents tool integration with Autodesk®.
Background
The Procore Documents plugin for Autodesk® allows you to interact with project files in Navisworks®, Revit®, and AutoCAD® applications. This integration helps empower team members to keep project files up to date and reduce the risk of rework.
Things to Consider
- Required User Permissions:
- 'Read Only' or higher level permissions to the project's Documents tools.
Note: Users must also be added to permissions lists as necessary for private files and folders in the project's Documents tool. See Manage Permissions for Files and Folders in the Project Level Documents Tool.
- 'Read Only' or higher level permissions to the project's Documents tools.
- Additional Information:
- The plugin application can only be installed on Windows computers.
- See the FAQ section for answers to common questions about using the Documents plugin.
Prerequisites
- You must have access to the Autodesk® applications (Navisworks®, Revit®, and AutoCAD®) that you want to use the Procore Documents plugin with.
Video
|
|
Steps
See steps for the following options:
- Step 1: Download and Install the Documents Plugin for Autodesk®
- Step 2: Export to the Documents Tool
- Step 3: Use the Procore Plugin in Navisworks®
Step 1: Download and Install the Documents Plugin for Autodesk®
Step 2: Export Files from Revit to the Documents Tool
Note
You can also export files from AutoCAD® using the same process. However, AutoCAD exports .dwg natively, and does not export .rvt files.- Open Revit® on your computer.
- Navigate to a 3D view in the project browser of Revit.
Note: You must be in a 3D view to export a file. - Click the Procore tab.
- Click Export Model.
- Select the relevant project folder.
- Select the type of file that you want to export.
Note: If you export native DWG or RVT, the export will be the entire file. If you export IFC or NWC, the active 3D view will be respected. - Enter a name for the file, or select an existing file if you want to upload a new version.
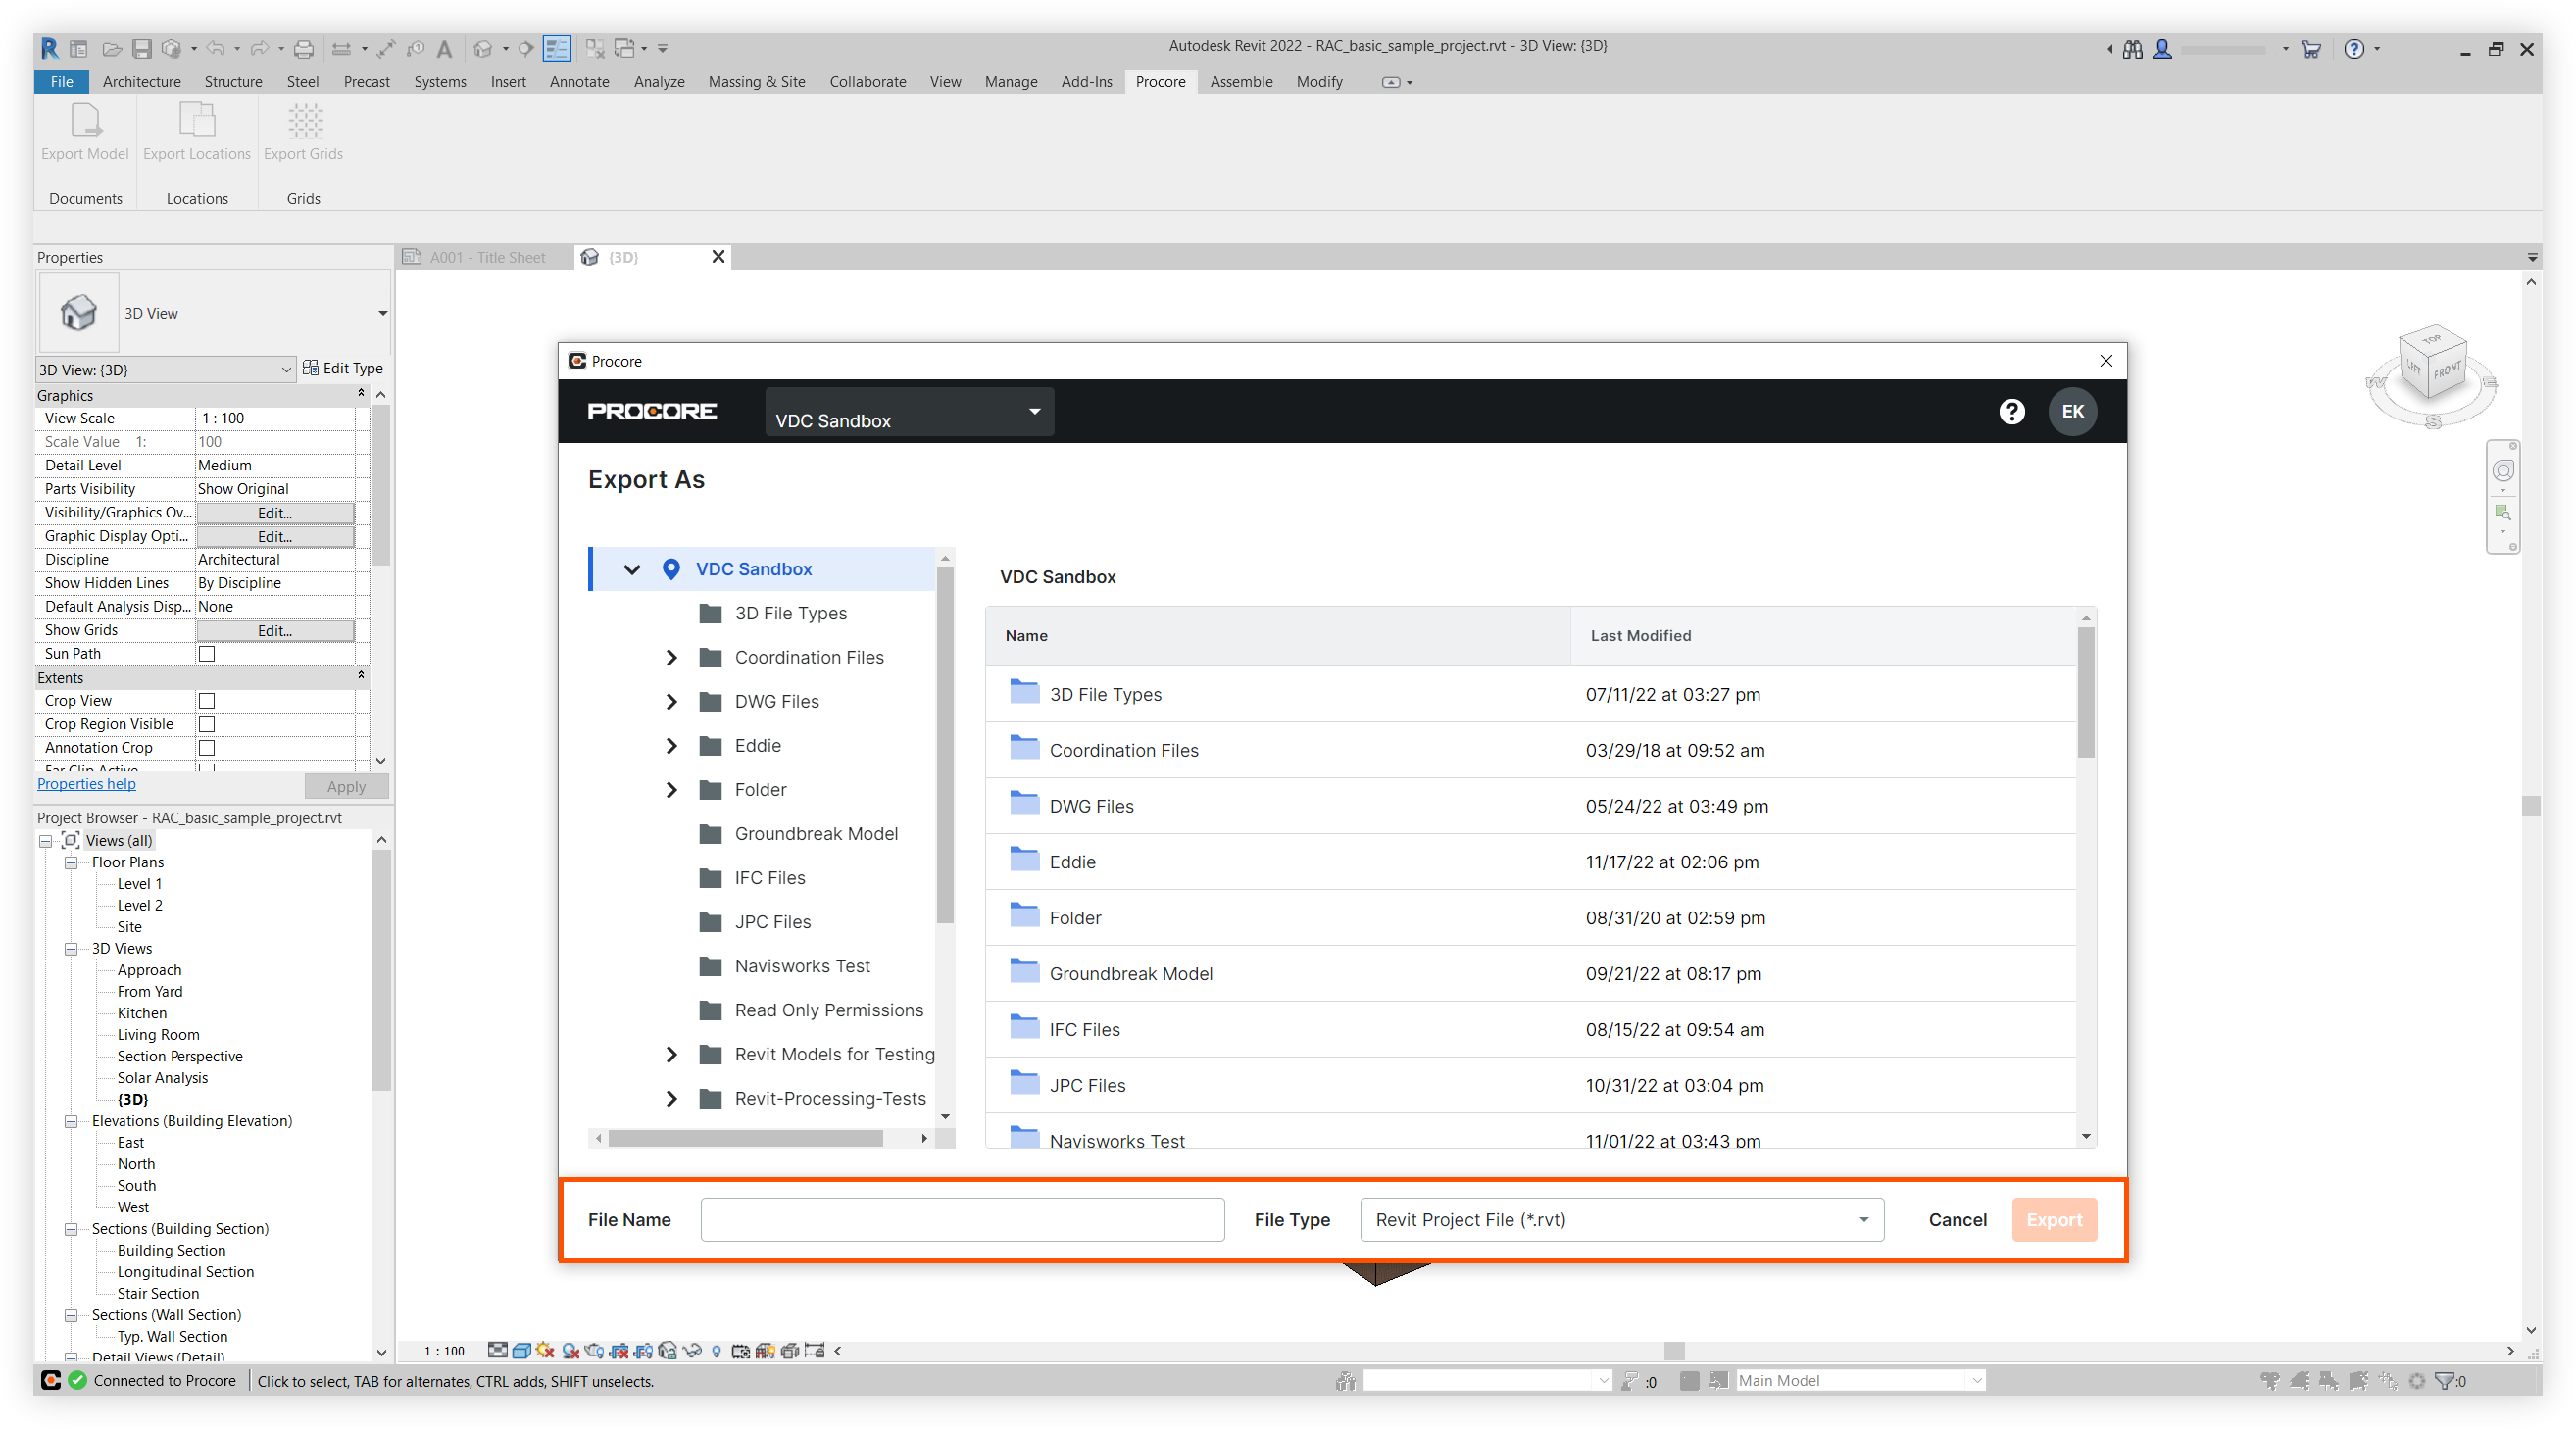
- Click Export.
Step 3: Use the Procore Plugin in Navisworks®
See the sections below for available actions:
Open Files
- Click the Procore tab in Navisworks®.
- Click Open.
Note: You will be prompted to log into Procore. - Click the 'Select a Project' menu and select the project you want to work in.
- Navigate to the relevant folder.
- Select the file that you want to open.
- Click Open.
The model will open in the viewer.
Append Files
- Click the Procore tab in Navisworks®.
- Click Append.
- Navigate to the relevant folder.
- Select the file.
- Click Append.
Save Files
If you have made changes to a file in Navisworks®, you can save it in the plugin so that the file is updated in the project's Documents tool.
Note: This option is currently only available for federated NWF (.nwf) files.
- While the file is selected on the Procore tab, click Save.
- Navigate to the project folder.
- Enter a name for the updated file in the File Name field.
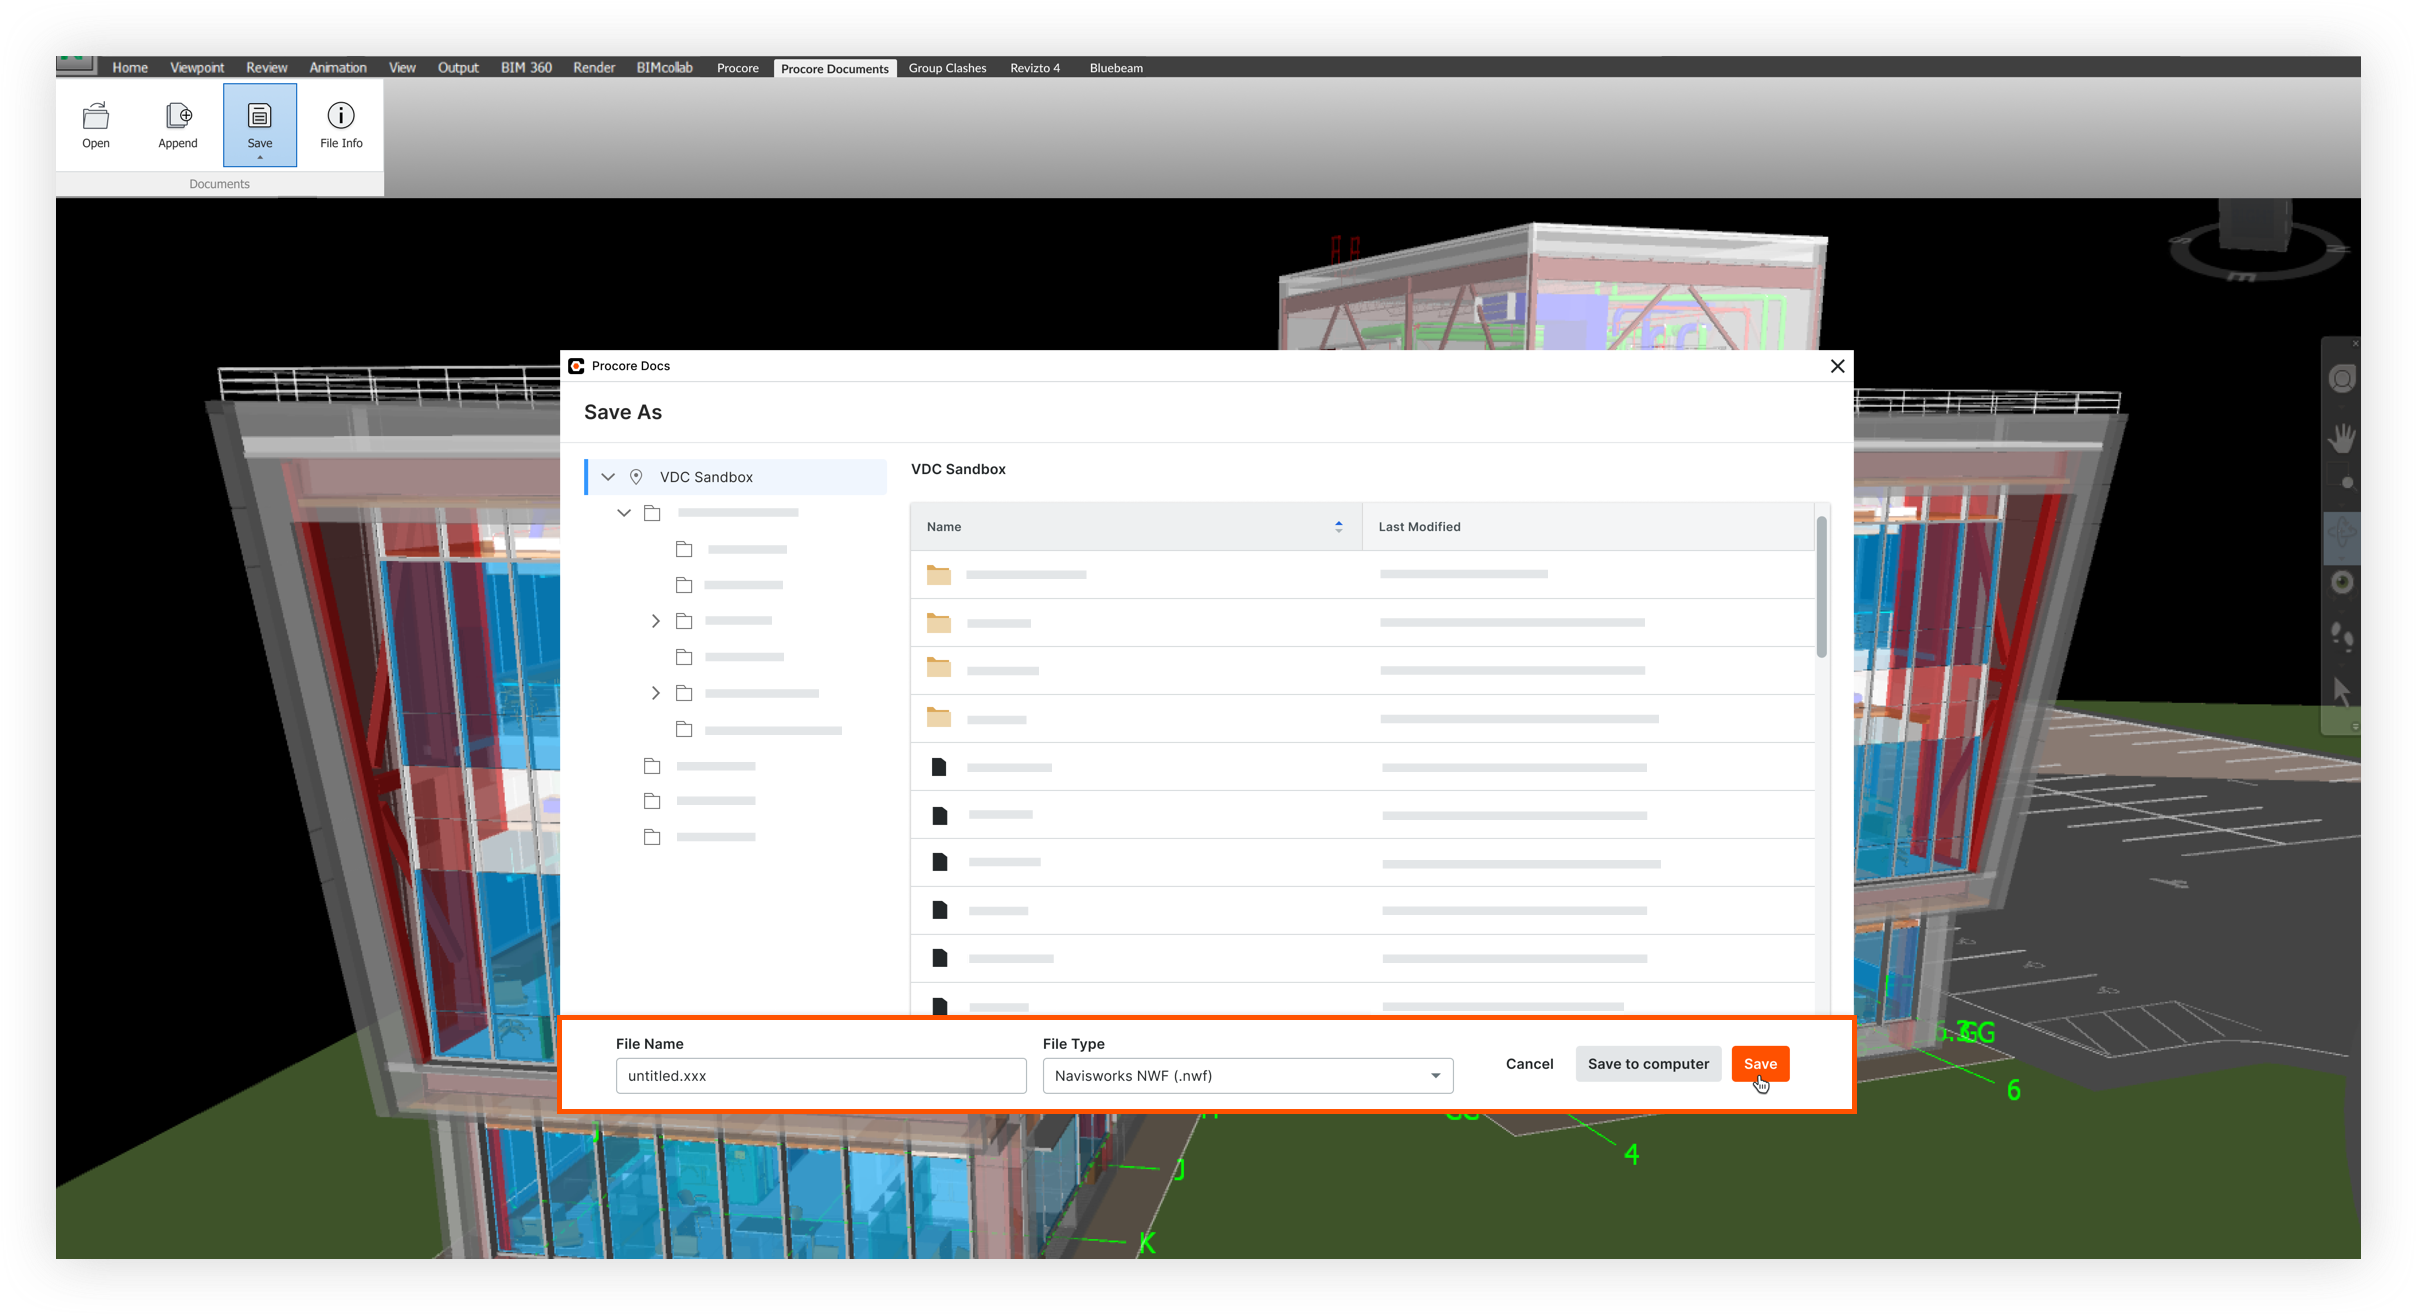
- Click Save.
The file will be saved as a .nwf file to Procore. You can also click Save to Computer if you need to save a copy to your computer.
View File Info
The File Info window shows important information for files that you have opened in your project. If someone uploads a new version of the file, you will see a notification and be able to update to the latest version of the file.
- Click File Info to open the window.
When a project receives an update, a Refresh button appears.
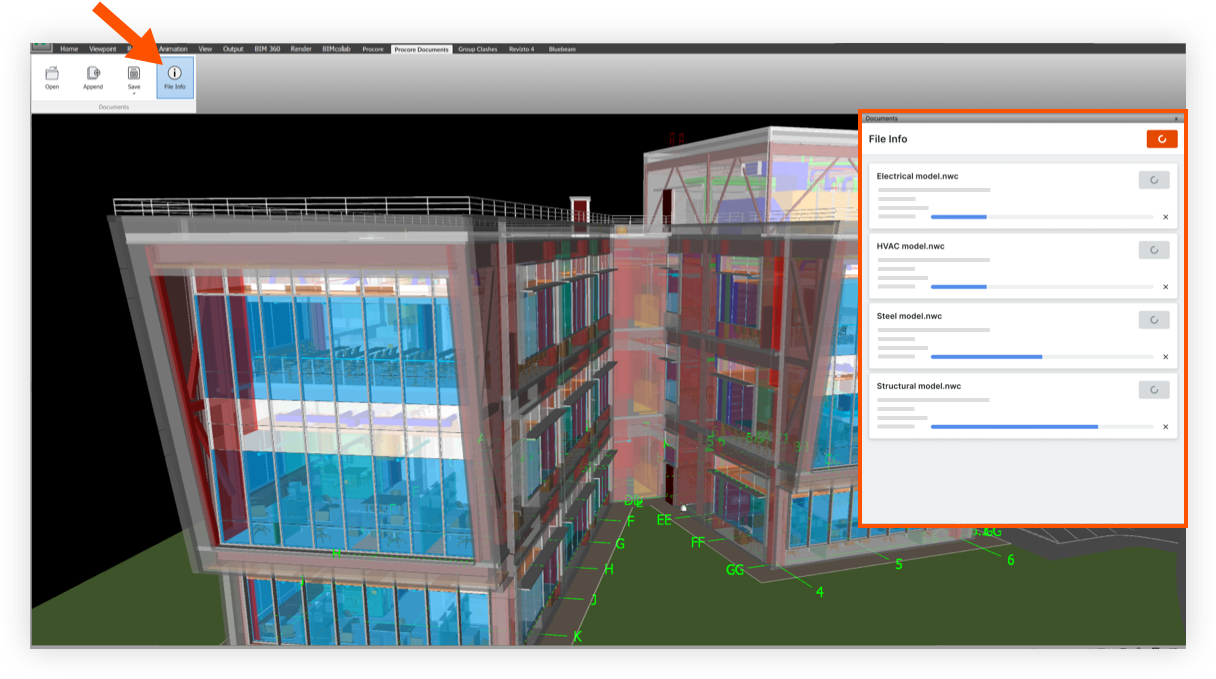
- Click Refresh to view the latest version.
FAQ
What file formats Are supported in the Integration?
The integration supports the following file types for the available actions:
- Open: 3dm, 3ds, asm, CATPart, CATProduct, cgr, cv7, dlv3, dri, dwf, dwfx, dwg, exp, fbx, g, ian, ifc, iges, igs, ipj, ipt, jt, man, model, neu, nwc, nwd, nwf, pdf, prj, prp, prt, prw, rvm, rvt, sab, sat, session, skp, sldasm, sldprt, step, stl, stp, wrl, wrz, x_b
- Append: dwg, ifc, nwc, nwd, rvt
- Save: nwf
- Export:
Note: To export to .nwc, you need to have NWC Export Utility installed on your computer.- AutoCAD®: dwg, dwf, dwfx, nwc, and pdf
- Revit®: rvt, ifc, nwc
What happens if I want to save a project that contains a model from Procore DocUments and my local computer?
Currently, Procore does not support saving a *.nwf file when you have a combination of models opened from Procore Documents and your local machine. It will ask you to save all the local files in the Procore cloud and then reload the model from Procore Documents.
HOW DO I CREATE A NEW VERSION OF A FILE WHEN EXPORTING?
Make sure you’ve selected the same extension, select the file you want to version, and then click Export. It will automatically save a new version in Procore Documents. If you type the same name, it will automatically version, as long as it’s the same extension.
IF I SAVE AN NWF LOCALLY, WILL IT MAINTAIN THE LINKS TO PROCORE DOCUMENTS?
Yes, it will maintain all the links to Procore Documents.
WHAT TYPE OF IFC IS BEING EXPORTED?
IFC 4 - Design Transfer View.
HOW DO I EXPORT DIFFERENT COORDINATES FOR MY NWC OUT OF REVIT?
In the settings, you can change the coordinates from 'Internal' to 'Shared' prior to exporting.

Which CAD products are supported?
AutoCAD® products including:
- AutoCAD Electrical
- AutoCAD Mechanical
- Architectural Desktop
- Inventor Professional
- Inventor Professional for Routed Systems
- Inventor Professional for Simulation
- Inventor Series
- AutoCAD OEM
- AutoCAD
- Autodesk Civil
- Autodesk Civil 3D
- Land Desktop
- AutoCAD Map 3D
- AutoCAD MEP
- AutoCAD Plant 3D
- AutoCAD P & ID - 2D
What information will be displayed in the Plugin status bar?
The status bar (in the bottom-left corner of the plugin) shows the following statuses:
| Icon | Status | Description |
|---|---|---|
| Connected to Procore | You are connected to Procore Documents and will be notified of any updates. | |
| Newer Model Version Available | You need to open the File Info window to update the models in your project. | |
| Procore Plugin Update Required | Click Open or Append to download the new version of the plugin. | |
| Not Connected to Procore | You are not connected to Procore Documents and will not be notified of any updates. |