Check Files In or Out in the Company Level Documents Tool
Objective
To check out, check in or reset a checkout of a file in the Company level Documents tool.
Background
After uploading a file to the Documents tool, you can upload new versions or you can check files in and out. If you work in an environment where multiple people have access to edit files, it is recommended that you check files in and out to prevent conflicts such as overriding another user's changes.
Things to Consider
- Required User Permissions:
- To check in or out a file, 'Standard' or 'Admin' on the Documents tool.
Note: Users with 'Standard' level permissions can only check in a file that they have checked out. - To reset a checkout, 'Admin' on the Documents tool.
- To check in or out a file, 'Standard' or 'Admin' on the Documents tool.
- Additional Information:
- If you work in an environment where multiple people have access to edit files, it is recommended that you check files in and out to prevent conflicts such as overriding another user's changes.
Steps
Check Out a File
Checking out a file downloads a copy of the current version of the file to your computer so you can update it. While the file is checked out, other users will not be permitted to upload a newer version of the file. When your file updates are ready, you can then upload the new version which also checks the file back into the tool.
- Navigate to the Documents tool.
- Navigate to and select the file you want to check out.
- Right-click on the file and click
 Check Out.
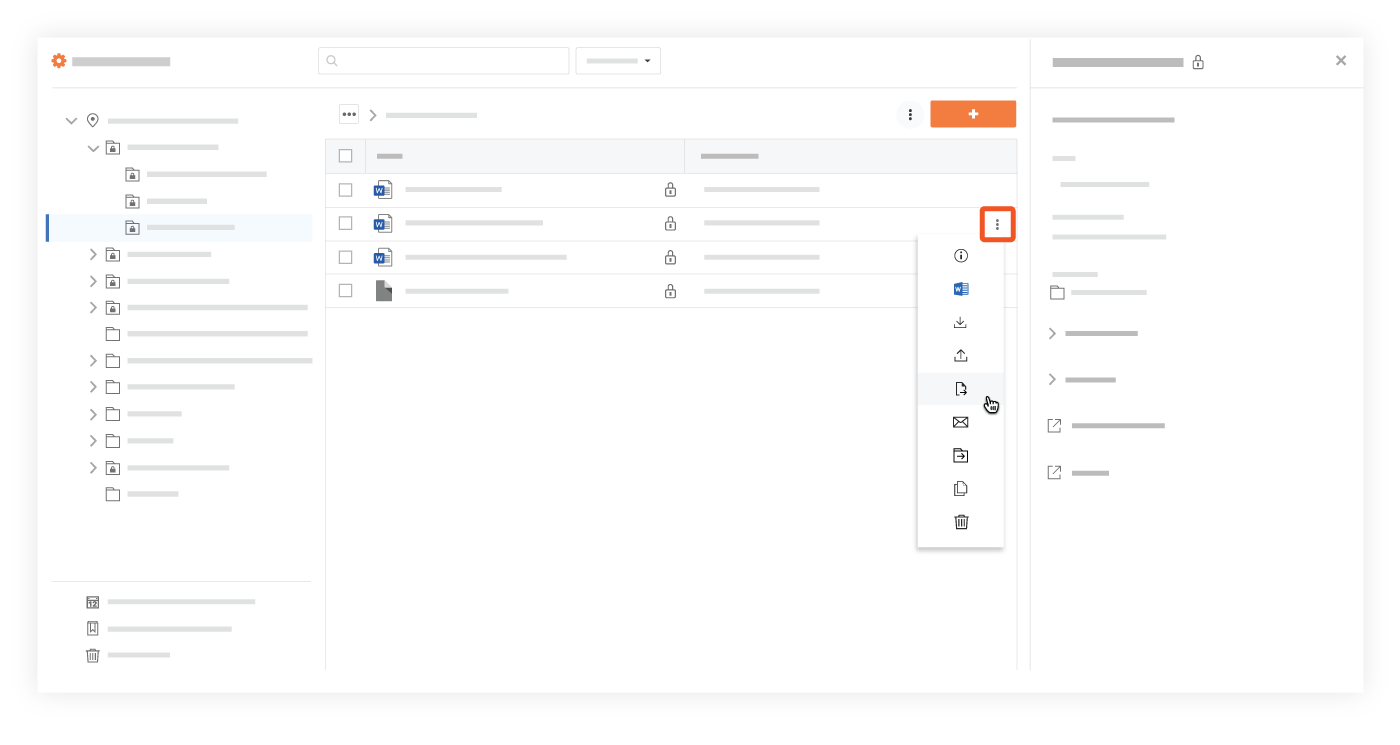
Note: You can also access this action by clicking the vertical ellipsis icon while the file is selected.

- Click the Duration drop-down menu to select the amount of time you want to check the file out for.
- Click Check Out to confirm the checkout.
Note: The file will automatically download to your computer.
Check In a File
Checking in a file allows you to upload a newer version of the file. When a file is checked in, other users with the appropriate access permission can then perform a check-out if they want to update the file.
- Navigate to the Documents tool.
- Navigate to and select the file that you previously checked out.
- Right-click on the file and click
 Check In.
Note: You can also access this action by clicking the vertical ellipsis icon while the file is selected.
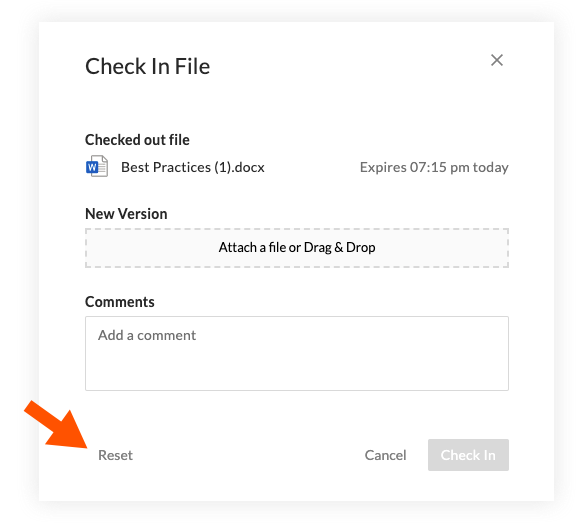
 - Drag and drop the file to the box under New Version.
OR
Click the box under New Version to browse and select a file. - Enter a comment to describe any changes made to the file.
- Click Check In.
Note: A new version of the file is uploaded to the tool.
Reset a Checkout
Resetting a checkout cancels a checkout so that other users with the appropriate access permission can check out the file. A reset can be performed by a user with 'Admin' level permission to the Documents tool.
- Navigate to the Documents tool.
- Navigate to and select the file that was previously checked out.
- Right-click on the file and click
 Check In.
Note: You can also access this action by clicking the vertical ellipsis icon while the file is selected.
 - Click Reset.

Note: The checkout is immediately reset.

