Review and Confirm Drawings
Objective
To review and confirm drawings uploaded to the project's Drawings tool.
Things to Consider
- Required User Permissions:
- 'Admin' permissions on the Drawings tool.
OR - 'Read Only' or 'Standard' permissions on the Drawings tool with the 'Upload and Review' granular permission enabled on the permission template.
Note: Users with the granular permission can only review the drawings that they uploaded themselves.
- 'Admin' permissions on the Drawings tool.
- Additional Information:
- If you find that drawing field names, such as Drawing No., Title, and Discipline, are not populating correctly, see How can I improve the accuracy of OCR on my drawings?
- If a drawing is not appearing in the correct orientation, you can rotate the PDF before confirming the drawing. See Can I rotate a drawing in Procore?
Prerequisites
Steps
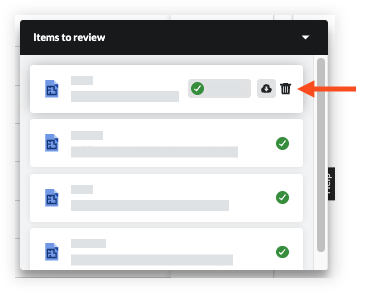
- Click the Items to Review pop up menu.

- Hover over the upload and click Review.
- If your drawing upload contains 8 or more sheets, you will see the 'Help Procore Auto-Label Your Upload' window.
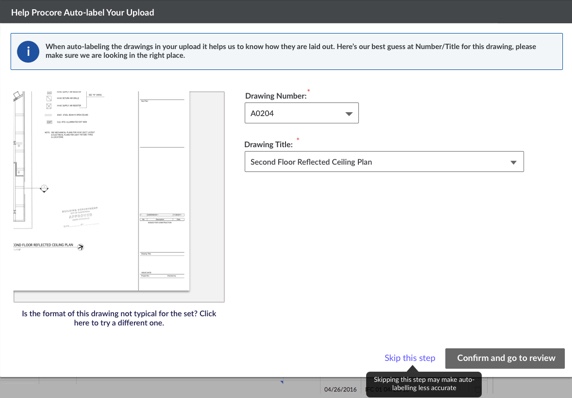
In the window, complete the following:- Verify that Procore has read the drawings correctly by selecting the correct number and title from the Drawing Number and Drawing Title drop-down menus.
Note: If you want Procore to evaluate a different drawing to yield more accurate results, click the 'Is the format of this drawing not typical for the set? Click here to try a different one' link. - Click Confirm and Go to Review.
Note: This opens the Confirm New Drawings page where you will be able to review and confirm drawings.
- Verify that Procore has read the drawings correctly by selecting the correct number and title from the Drawing Number and Drawing Title drop-down menus.
- If your drawing upload contains 8 or more sheets, you will see the 'Help Procore Auto-Label Your Upload' window.
- Verify all fields match the drawing sheet before confirming:
Note: By default, Procore places focus on the lower right corner of the drawing. To change the focus of the image thumbnail, click-and-drag the image.- General Information
- Number: Verify the drawing number.
- Discipline: Verify the drawing discipline.
Note:- This field is automatically recognised by the letters that appear before the drawing number. You can set which letters designate which disciplines by following the directions here: Configure Default Drawing Disciplines.
- If the discipline for the drawing was not populated or does not appear on the drawing, you can choose to enter it manually. After confirming the drawing, the new discipline will be added to the Discipline Abbreviation Setup list for the project and can be selected for other drawings.
- Title: Verify the title of the drawing.
- Versions: Versions are ordered according to the Drawing Date field, but you can use a drag-and-drop operation to place this version you are currently uploading into a different order.
Note: The version at the top is considered the current version.
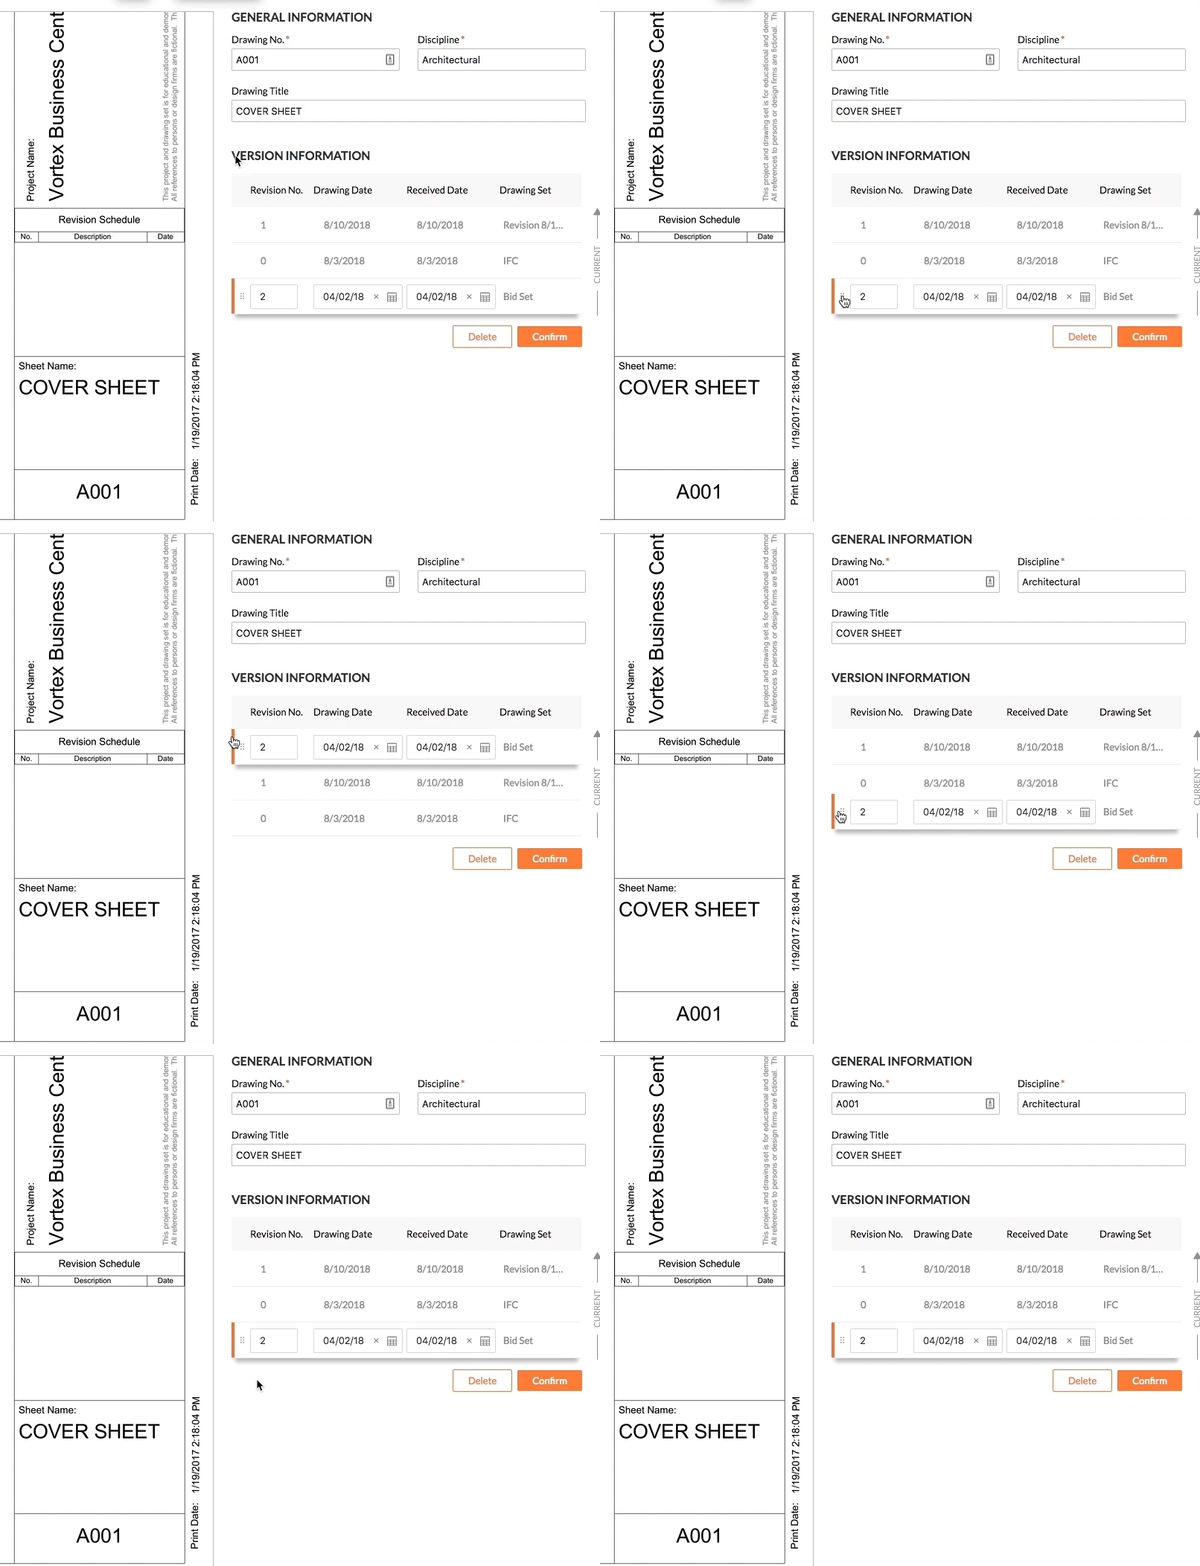
- Revision: Verify the revision field.
Notes:- When you upload a drawing that matches a drawing number that already exists in your Drawings register, Procore will mark this drawing as the next revision number or letter in the sequence. For example, if you previously uploaded revision 5 of drawing A2.1 and you are uploading a new revision now, revision 6 will appear in this field.
- If you entered a Drawing Date for a set of drawing revisions, Procore will sort the drawings from oldest to most current based on the drawing dates. However, the revision numbers may need to be entered manually.
- Alphanumeric revision numbers are accepted (e.g. Revision Number A1, 1A or A.1). To set which order is used on the configuration page of drawings, see Configure Advanced Settings: Drawings.
- If you enter a number that already exists in your drawings register, you will be alerted that it is a duplicate revision. In order to add a drawing with the same revision field, one of the following fields must be unique: Drawing Set Name, Drawing Date or Received Date.
- Date Authored and Date Received: Verify the dates or select them from the calendar. If you previously set the dates on the drawing upload page, Procore will use those dates, but you can change them as needed.
- Set: This field is automatically populated based on the set you uploaded the drawings into.
- Revision: Verify the revision field.
- General Information
- Optional: If a drawing is not appearing in the correct orientation, you can rotate the PDF before confirming the drawing. See Can I rotate a drawing in Procore?
Note: You cannot rotate the drawing after you have confirmed the drawing.- Click Rotate Drawing.
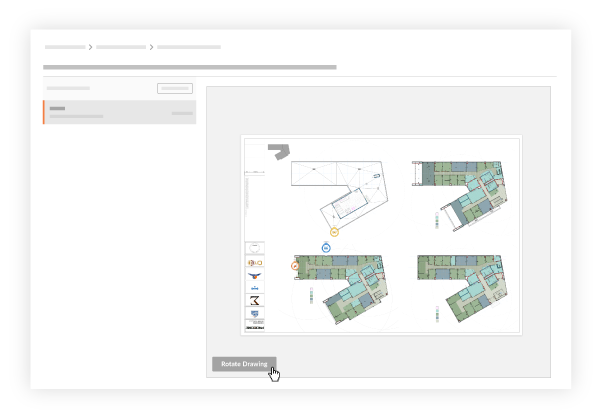
- Click the clockwise or counter-clockwise rotate icons to rotate the drawing to the correct position.
- Click Update.
- Click Rotate Drawing.
- Confirm your drawings:
- If you only uploaded one drawing or want to confirm one drawing at a time, click Confirm.
- If you uploaded multiple drawings:
- Click through the set of drawings to ensure all information is correct. Tip! You can press the UP/DOWN arrows on your keyboard to scroll through drawings in the set.
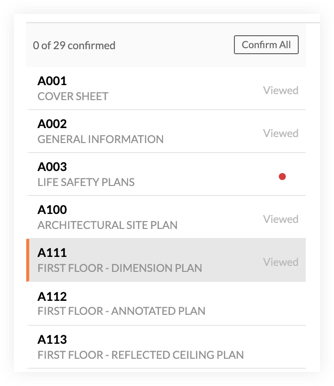
Note: Drawings you have clicked on are designated by the word 'Viewed' in the drawings list. If you view a drawing and leave the Revision field blank, a red dot appears on the drawing to indicate that there are unresolved errors.
- Press SHIFT on your keyboard to be able to click and select multiple drawings that are in a row.
- Press CONTROL (PC) or COMMAND (Mac) on your keyboard to be able to select multiple drawings individually.
- Click Confirm Selected.
OR
If all drawings have been reviewed and no errors are present, click Confirm All.
- Click through the set of drawings to ensure all information is correct. Tip! You can press the UP/DOWN arrows on your keyboard to scroll through drawings in the set.
Optional: Remove Drawings
If drawings have been uploaded that do not need to be added to the drawings register, users with 'Admin' level permission to the Drawings tool can remove them.
- To delete one or more pending drawings, click the Items to Review pop up.
- To delete the entire drawing package, navigate to the Drawings landing page and click the 'x' on the set you want to remove. Click OK to confirm.
