Best Practices: Submittal Packages - Creation and Review
Note
This page describes recommended best practices for using submittal packages. Click here to view tutorials, videos and more about the project's Submittals tool.Introduction
In this article, you'll find the recommended sequence of events to maximise the use of submittal packages.
Step 1: Create Submittal Packages and Items
Option 1: Submittal Import
The submittal import option via CSV is the quickest way to create Submittal items and packages at the same time. The first four columns in the import are specific to package information. The fields are not required to process the import, but you will save time by completing them on the import.

"Package Title" (Column A) and "Package Number" (Column B) can use whatever format works best for your organisation. For recommendations on package titles, refer to the previous article Best Practices: Submittal Packages - Submittal Itemization. Keep in mind that a package's number is a user-defined field when you import, create or edit the package. Procore does not currently allow multiple spec sections to be selected on a package, so "Package Spec Section Number" and "Package Spec Section Description" (Columns C & D) can only reference a single spec section.
Option 2: Manually Create Packages
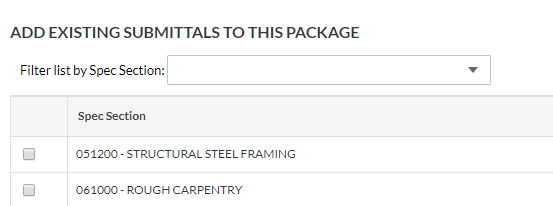
If you used Submittal Builder or just created submittal items manually, you can always add them into packages as a follow-up step. There isn't a way to bulk add submittals to a submittal package, so we recommend Option 1 above whenever possible. If you choose to manually create packages, you can filter by a specific spec section to narrow down the available selections.
Step 2: (Optional) Manage Submittal Item Numbering in a Package
We recommend that you use 0 as a temporary placeholder for your submittals' numbers when you create them because it can be difficult to know the order in which you'll receive and send them. As you receive the submittal items but before you send them for review, click the "Edit" button on the package. In this edit mode, you can inline edit the submittal numbers. Once the submittal numbers are set, continue to the next step to bulk edit the package and send the items for review.
Step 3: Bulk Edit Submittal Items in a Package
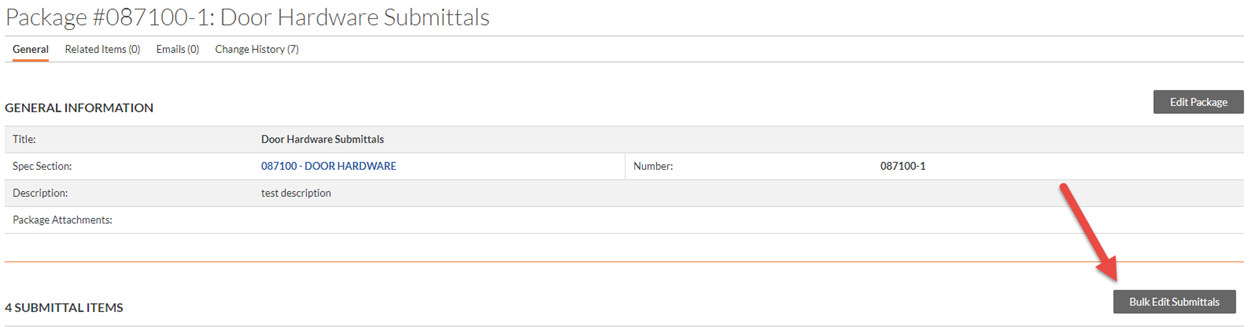
When a submittal registry is created early (before buyout, for example), the known details within submittal items are generally limited. Via the "Bulk Edit" button within a submittal package, you can quickly add the missing data to multiple submittal items within a package as the information becomes known. You can also apply a workflow from the same screen. Without using packages, this would be two separate steps for each group of submittals if you did the same thing via the list view bulk edit option.
Step 4: Initiate Workflows and Digest Email Notifications
Once workflows have been added to the items within the submittal package, you are now ready to send the "Action Required" emails to the first person in the workflow. Unlike creating submittals individually where multiple notification emails go out once you click "Create and Send Email", packages take a different approach that results in a single email sent to each user.
After a workflow has been added to at least one submittal in a package, a new alert banner will appear on the package view page. This banner allows for an Admin user to initiate a single "Action Required" email to the first person in the workflow. Fewer submittal emails is a major benefit for using the package functionality.

Note
The workflows don't need to be exactly the same for all submittals within a package. The Submitters, Approvers and Due Dates can all be different and each user will receive their own digest email based on their involvement in the workflow.We recommended that you send emails for all the submittal items within a package at the same time. You can add new items to a package at any point, but clicking "Send Now" in the package alert banner will also resend any previously sent email(s), which could cause confusion for your Submitters/Approvers.
Step 5: Submitter Role - Package Review and Response
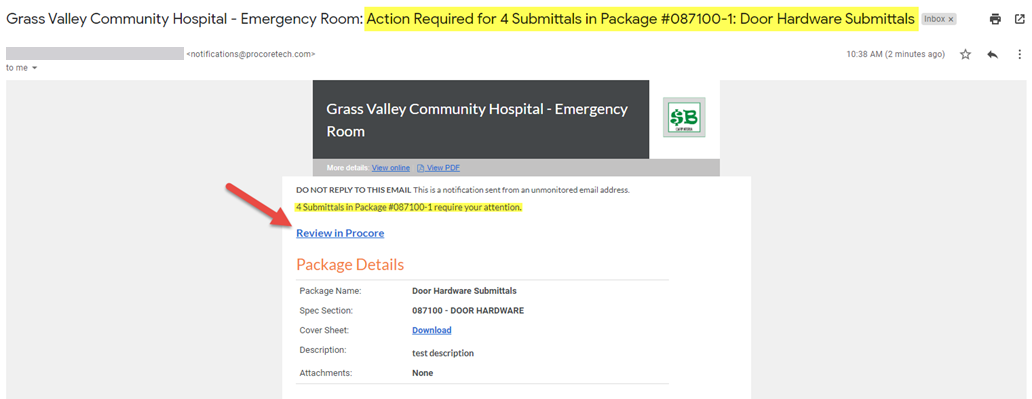
Once you click the "Send Now" button, the "Action Required" email shows the recipient all submittals that now require their response (4 items in this example). They can click the "Review in Procore" link to go directly to the page in Procore where they can submit their requested response and documents.
In the example review page below, you can see all four items have the Door Contractor listed as the 'Ball in Court'. This view is where users can see and respond to all of their items from a single page and is another major benefit to using packages. Clicking "Review" for each item shows its Due Date and includes the fields for users to enter their response, comments and attachments.
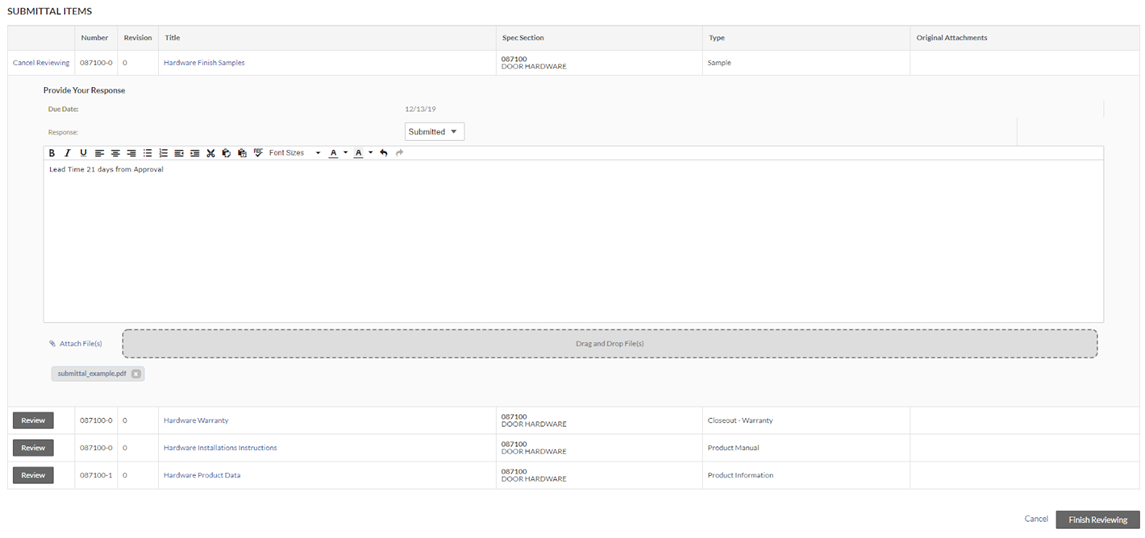
Because the workflows exist on the individual submittal items, due dates do not need to be the same for each submittal in a package. In the example above, we included a submittal item for a Close out Warranty that is not due for several months. If the Door Contractor is not ready to submit this item right now, they can submit the other three items without getting delayed by this one close out item. The Door Contractor will stay listed as the 'Ball in Court' for the warranty until it is submitted. Overdue email notifications will also be sent to the Door Contractor if they do not submit by the due date. This is a great way to keep on track for close out deliverables. If your project's design teams prefer to receive "complete" packages, you can easily move any close out item to a separate package.
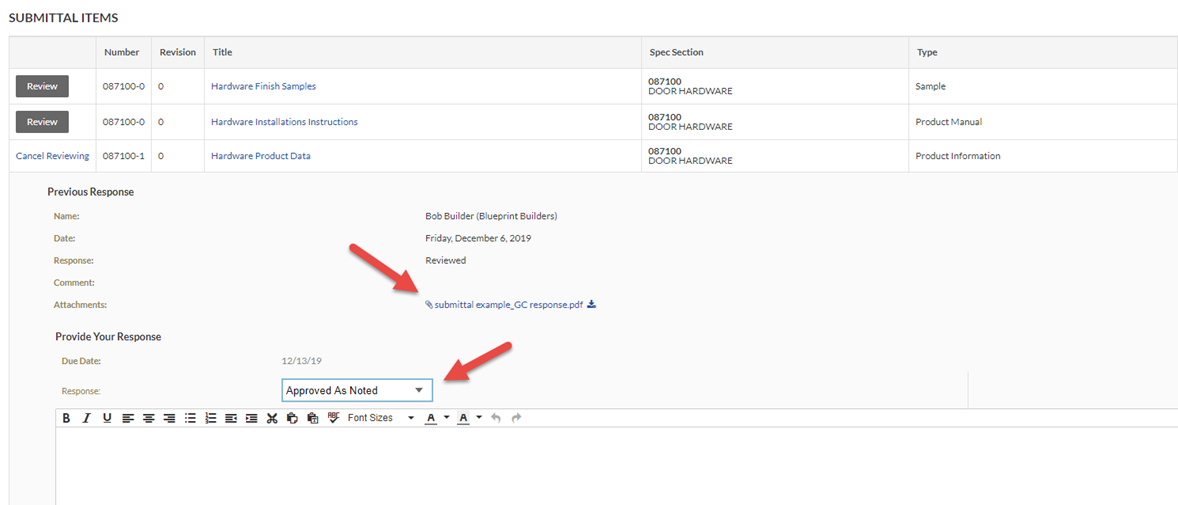
Step 6: Approver Role - Package Review and Response
The Approver's process is similar to the Submitter's process described above. The Approver receives a single "Action Required" email with the three items in that package that they need to review. Following the "Review in Procore" link in the email, the review screen is nearly identical to the Submitter role. The only differences are the selections available under the "Response" dropdown and the "Previous Response" section.
Again, because the workflows exist on the individual submittal items, they can each be forwarded to another user or approved separately. Regardless of how the submittal items proceed, each user remains listed as the 'Ball in Court' until they post their response.
Next in this Series
Best Practices: Submittal Packages - Distribution and Revision