Add Photos to a Drawing (Android)
Objective
To link photos to a drawing using the Procore app on an Android mobile device.
Things to Consider
- Navigate to the Drawings tool using the Procore app on an Android mobile device.
- Tap the drawing to which you want to add a photo.
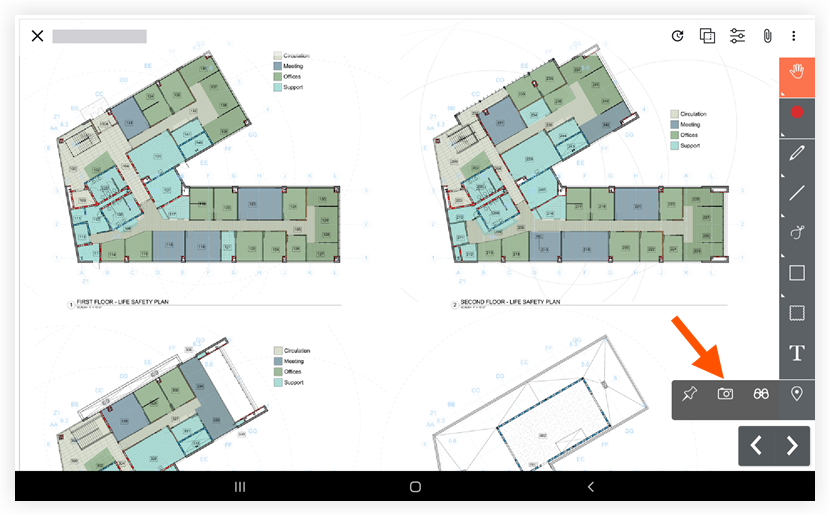
- Select the camera icon
 from the Markup toolbar, or select an existing camera markup icon in the drawing to add additional photos to the location. See image below:
- Tap the location on the drawing where you want to place photos.
- Select from the following options:
- Choose from Procore: Tap this option to select an existing photo from your project's Photos tool.
- Choose from Library: Tap this option to select a photo file from your mobile device's photos library.
- Camera: Tap this option to take a new photo with your device's camera.
Note: You can move the camera icon around after you have added photos to your personal layer, but you cannot move the icon once you've published the photos for everyone on the project to see on the published layer. What is the difference between personal and published drawing markups?- Take a photo without mark up.
- Tap the shutter to take a photo.
- Tap X.
- Take a photo with mark up.
- Tap the mark up
 icon to take the photo and immediately mark it up.
 - Tap the shutter to take a photo.
- Mark Up the Photo.
- Tap Save as New Photo if you want to save both the original and marked up photo.
OR
Tap Overwrite if you want to only save your marked up photo.
- Tap the mark up
- Tap X.
- Take a photo without mark up.
- Optional: Tap Publish to publish personal drawing mark ups for your team to reference.
- Optional: View the photos you've linked by selecting the Select markup tool and tapping the camera icon in the drawing.
- Optional: View all photos you've added to drawings in the Photos tool in the 'Photos from Drawings' album.