Limited Release
Procore is adding a new 'Company Information' tab where certain companies can manage their office settings. If you do not see the 'Office Settings' options in the 'General Settings' tab, see
Manage Company Information instead.
Objective
To add a list of office locations to your company's Procore account and then associate those offices with a project.
Things to Consider
- Required User Permissions:
- To add a company office location, 'Admin' level permission on the Company level Admin tool.
- To associate a company office location with a project, 'Admin' level permission on the Project level Admin tool.
- Additional Information:
- The information that you enter in the Steps below will appear in Procore's reports and most PDF files that your users export from Procore's project tools.
Steps
- Navigate to the Company level Admin tool.
- Under 'Company Settings', click General Settings.
- Scroll to 'Office Settings'.

- Click Add Office.
- Do the following:
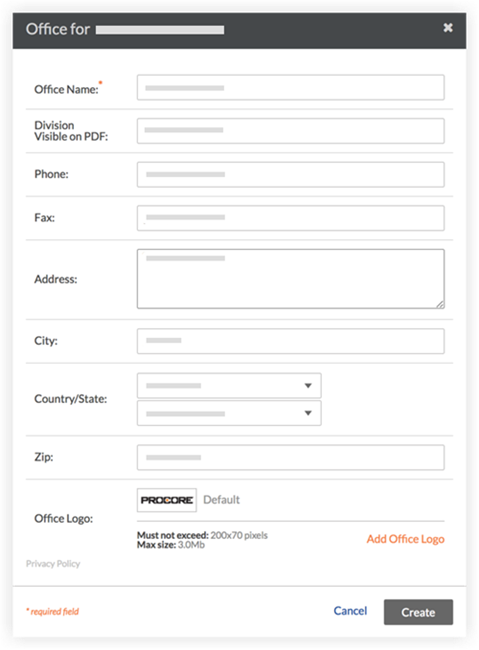
-
*Office Name. Add the title of the office. This is a required field (Note: An office name cannot contain a single ('), double quote ("), or the word 'or').
-
Division Visible on PDF: The text entered into this field, if populated, will overwrite the company name that is visible on PDFs exported from projects associated with this office. See Assign an Office Location to a Project. If your company categorizes its offices into divisions or branches, you can enter the name for the office here. For example, business divisions can used to signify specific regions (i.e., Northwest, Northeast, Southwest), construction types (i.e., Infrastructure, Residential, Commercial) or even specific subdivisions of a company. Note: The Division Name cannot contain the word 'or').
-
Phone. Type the main contact phone number associated with this office.
-
Fax: Type the main fax number associated with this office.
-
Address. Enter the number and street name for the office.
-
City. Enter the city name.
-
Country. Select the country from the drop-down menu.
-
State. Select the state from the drop-down menu.
-
Postcode. Enter the postcode.
-
Upload Office Logo. Click Choose File or drag-and-drop a file from your computer that will serve as the office logo. Office logos must not exceed 200 x 70 pixels. File size limit: 3.0 MB. The logo that you upload here will appear on most emails, forms, pages and reports associated with the office. See Upload an Office Logo.
- Click Create.
Note: The office can now be assigned to a Procore project. See Assign an Office Location to a Project.
- If your company has multiple office locations, designate the location that serves as your company's headquarters or home office by choosing the appropriate Corporate Office option button.
