Assign a Workflow Template to a Project
Objective
To assign a published workflow template to projects in your company's account.
Background
After you publish a workflow template, you can assign them to individual projects to be used for approvals.
Things to Consider
- Required User Permissions:
- 'Admin' level permissions on the Company Workflows tool.
OR - 'Read Only' or 'Standard' level permissions on the Company Workflows tool with the 'Assign workflow templates to all projects accessible to user' granular permission enabled on your company permissions template.
- 'Admin' level permissions on the Company Workflows tool.
Steps
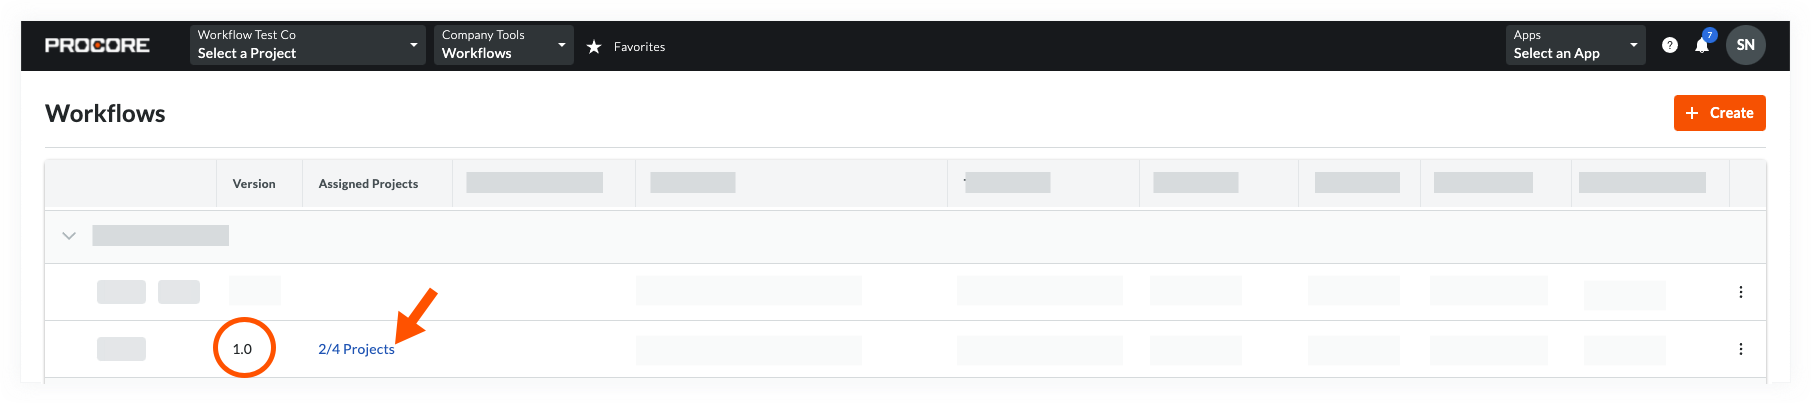
- Navigate to the Company Workflows tool.
- In the 'Workflows' table, locate the version that you want to publish.
- Click the hyperlink in the 'Assigned Projects' column.
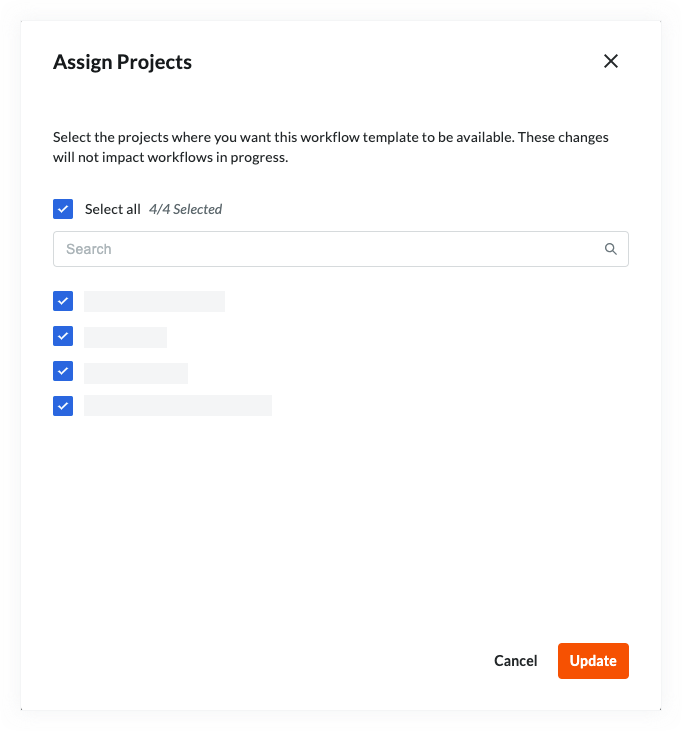
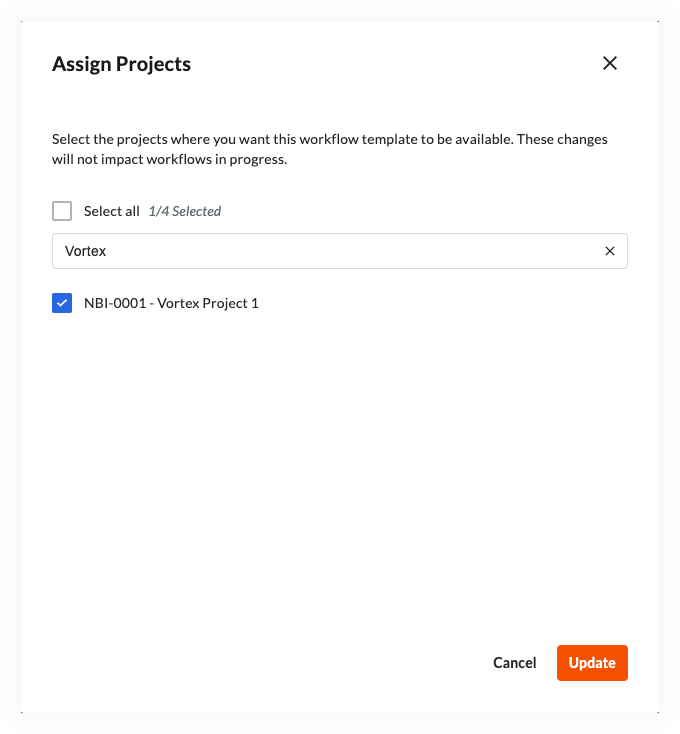
- In the 'Assign Projects' dialogue box, do the following:
- To select all of the active projects in your company's account, place a mark in the Select All check box.
- To search for individual projects, start typing the project name in the Search box. Then place a mark in the checkbox(es) that corresponds to the desired project(s).
- To select all of the active projects in your company's account, place a mark in the Select All check box.
- Click Update.
Assign a Workflow Template to New Projects
A workflow template can be assigned automatically to all new projects so it won't need to be done each time a new project is created.
- Navigate to the Company Workflows tool.
- In the 'Workflows' table, locate the version that you want to assign to all new projects.
- Hover over the space in the 'Assign to New Projects' column.
- Click Assign.
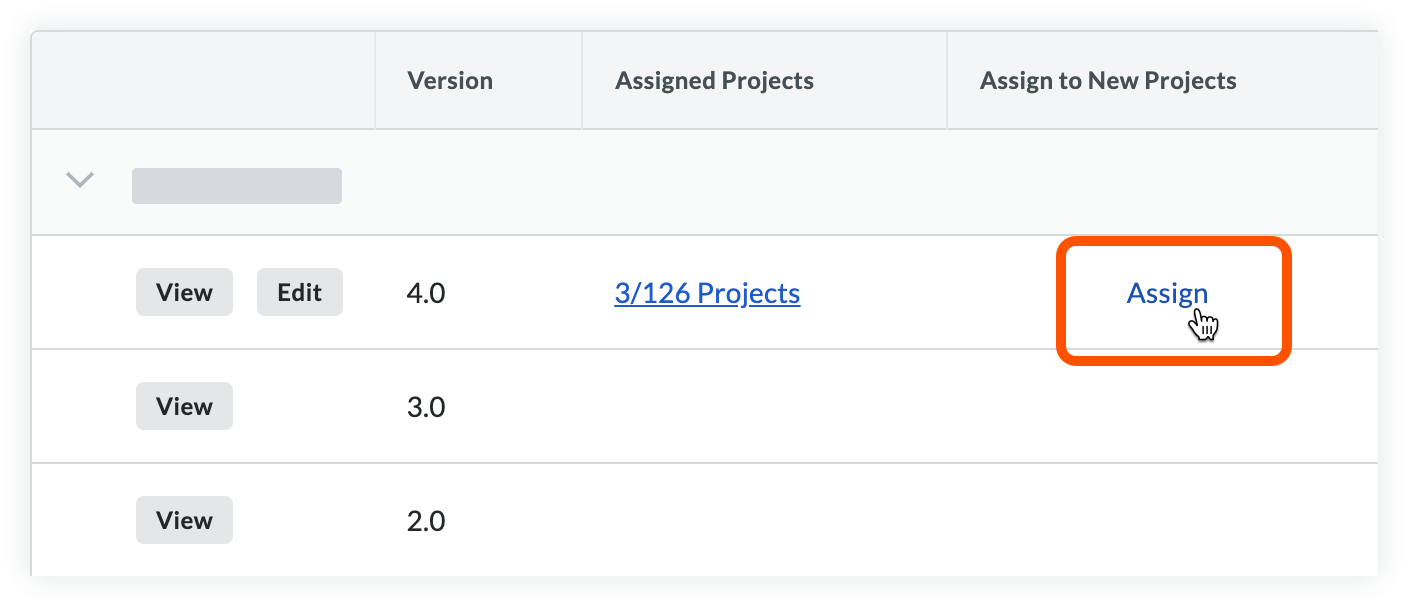
- A checkmark will appear showing that it has been assigned to all new projects.
Note: Click the checkmark to stop assigning the template to new projects automatically.