Create a Subcontract from a Change Event
Objective
To create a subcontract from a change event.
Background
If a change event leads to a new for a new subcontract, use the steps below.
Things to Consider
- Required User Permissions:
- 'Admin' level permissions on the project's Change Events tool.
AND - 'Admin' level permissions on the project's Commitments tool.
- 'Admin' level permissions on the project's Change Events tool.
-
For companies using the
 ERP Integrations tool: Prerequisites, requirements, limitations, and considerations might apply depending on the ERP system your Procore account is integrated with. Visit Things to Know about your ERP Integration for details.
Prerequisites
- Add the Change Events tool to the project. See Add and Remove Project Tools.
Steps
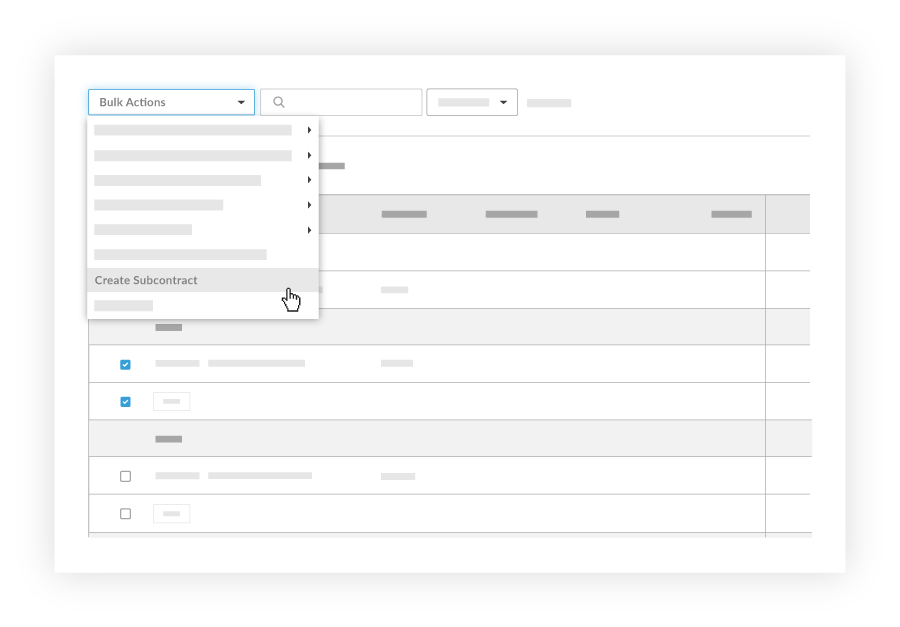
- Navigate to the project's Change Events tool.
- Select the change event line items you want to create a subcontract for.
- From the Bulk Actions drop-down list, select Create a Subcontract.
Note: The Schedule of Values (SOVs) will be created from the change event's line items.
- Enter general information about the commitment.
- #
Enter or validate the unique identifier for the commitment. If you are creating the first commitment of a project, Procore will automatically number the first subcontract. (e.g. PO-01-001) Subsequent commitments will automatically be prefilled with the next sequential number based on the format of the first commitment. (e.g. PO-01-002) - Contract Company
Select the vendor/company with responsibility for fulfilling the commitment (e.g. American Construction Co.). This vendor/company must exist in the Project Directory. See Add a Company to the Project Directory (Note: For companies using the ERP Integrations tool with Sage 300 CRE, synced vendor/company data will have "(Sage)" appended to their names). - Title
This field is automatically filled with the name of the correlated change event, but you have the ability to adjust to your liking. - Status
Specify the status of the commitment. (Default: Draft) Subcontracts with the status set to Draft, Out for Tender, Void or Terminated will not be reflected on the budget. Subcontracts with the status Out for Signature will be listed in the Pending Cost column, while subcontracts with the status set to Approved or Completed will be listed in the Committed Cost column on the Budget.
Note: A "Terminated" status will not reflect the Commitment in the Budget, so it should only be used if the commitment company has not performed any work on the project. - Private
Specify who can view the subcontract. By default, the subcontract is "private" and is only visible to users with 'Admin' level permissions on the Commitments tool. You can also allow non-Admin level users to view the subcontract if desired. Additionally, you can allow selected non-Admin users to have 'Read-Only' access to the individual line items on the SOV tab. - Start Date
Select the date when the scope of work will begin on the worksite. - Estimated Completion Date
Select the estimated date of when the scope of work will be finished. - Signed Contract Received Date
Select the date when the subcontract was officially signed. - Actual Completion Date
Select the date when the scope of work was deemed complete. - Default Retention
Specify the percent of payment retention that will be withheld (for example, 10). - Executed
You can use this checkbox to denote that the contract was fully signed and executed. - Description
This field is automatically filled with the name and description of the correlated change event, but you have the ability to adjust to your liking. - Inclusions
Disclose any inclusions that may not be clearly stated in the related contract documents. - Exclusions
Disclose any exclusions that may not be clearly stated in the related contract documents. - Attachments
Attach any related materials such as pricing quotes, receipts, signed purchase orders, etc. You may attach files that have been uploaded to your project or drag and drop files from your local computer.
- #
- Save your changes. Typically, you will use the Create option instead of the Create & Email option because you may still need to add items in the SOV.
- Click the Schedule of Values tab. The Schedule of Values will be created from the change event line items.
If you would like to learn more about Procore's change events management software and how it can help your business, please visit our construction change order product page  .
.