Enable the Payments Issued Tab on a Commitment from the Progress Billings Tool
Limited Release
 The Progress Billings tool is only available to Procore customers in the United States who have implemented the Procore for Specialty Contractors point-of-view dictionary. To learn more, see (Limited Release) Owners & Specialty Contractors Point-of-View Dictionary Options.
 Objective
To enable the 'Payments Issued' tab on a commitment from the Progress Billings tool.
Background
You can enable the 'Payments Issued' tab on a purchase order or a subcontract. As shown in the steps below, the controls in this tab give your project's users the ability to add new payment line items for a purchase order or subcontract. It also provides a convenient list that summarises all of the payments issued on project.
Things to Consider
- Required User Permissions:
- 'Admin' level permissions on the project's Commitments tool.
Prerequisites
Steps
- Navigate to the project's Progress Billings tool.
- Under the Subcontractor tab, click the link in the Commitment column to select the commitment that you want to work with.
- Click the Advanced Settings tab.
Note
Depending on the size of your browser window, this tab may be listed as an option in the More menu. - Click Edit on the right-hand side of the screen.
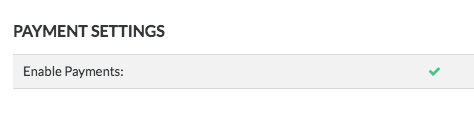
- Scroll to Payment Settings.
- Place a mark in the Enable Payments check box.
- Click Save.