Add or Manage Documents for a Tender Room in Portfolio Financials
Objective
To add or manage files in the Documents section of a Tender Room in Portfolio Financials.
Background
The Tender Room in Portfolio Financials is a shared portal between the owner and tenderers. Before you can send and manage tender, you must set up the Tender Room. The Trade Setup page is where you will enter information and upload documentation so that your tenderers can accurately submit their tender.
You can upload any documents (such as drawings, floor plans, specifications and rules and regulations) that your tenderers will need in order to complete their tender to the Documents section. You can upload new files for your tenderers or choose from existing files that have already been uploaded to the project documents.
Things to Consider
- Required User Permissions:
- 'Limited' access to the project or higher.
Note: Users with 'Limited' access must be on the Tender Room Team for the project.
- 'Limited' access to the project or higher.
- Additional Information:
- Important! Any information entered on the Trade Setup page, including files uploaded to the Documents section, will be visible to tenderers.
Steps
- Navigate to the relevant Tender Room.
- Click the Trade Setup tab.
- Scroll to Tender Documents.
- Add and manage files and folders as necessary. See the steps below:
Add and Manage Files
Note: If you upload any new documents during the tendering process after tenderers have been invited, your tenderers will be notified of your changes via email.
To upload new files into the Tender Room:
- Choose whether you want to upload files to a particular folder.
- If you do not want to add files to a particular folder:
- Click Add New Files.
- Locate and select the files you want to upload.
- To add files into a folder:
- Click the folder name to open the folder.
Note: If you want to add files to a new folder, see Create a New Folder below. - Click Add New Files to This Folder.
- Locate and select the files you want to upload.
- Click the folder name to open the folder.
- If you do not want to add files to a particular folder:
To import existing files from your project into the Tender Room:
- Click Add New Files.
- Select the files you want to import. A checkmark will appear next to selected items.
- Click Add.
To edit a file name:
- Click the vertical ellipsis
 icon for the file you want to rename.
 - Enter the revised file name.
- Click Save.
To move a file:
- Click the vertical ellipsis
 icon for the file you want to move.
 - Click Move To....
- Click the name of the folder you want to move the file to.
Note: If you want to move a file back to the main Files section, click Tender Documents as your selection. - Click Save.
To delete a file:
- Click the vertical ellipsis
 icon for the file you want to delete.
 - Click Delete Document.
- Click Delete to confirm.
Add and Manage Folders
To create a new folder:
- Click the top vertical ellipsis
 icon in the Documents section.

- Click Create New Folder.
- Enter a name for the folder.
- Click Save.
To edit a folder name:
- Click the vertical ellipsis
 icon for the folder you want to rename.
 - Enter the revised folder name.
- Click Save.
To delete a folder:
- Locate the folder you want to delete in the Folders area of the Documents section.
- Click the vertical ellipsis
 icon.
icon. - Click Delete Folder.
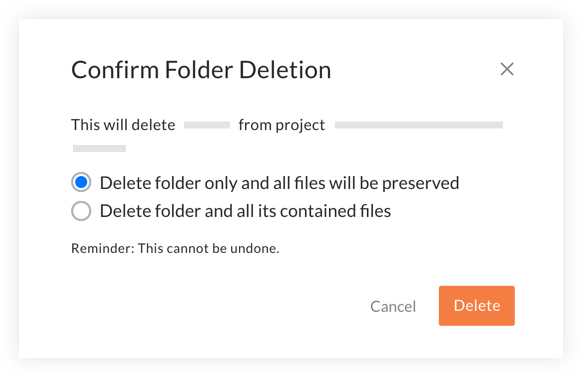
- A 'Confirm Folder Deletion' window opens.

- If you want to save the files that are currently in the folder, click 'Delete folder only and all files will be preserved'.
Note: Any files will be moved back to the main files section after the folder is deleted. - If you want all files within the folder to be permanently deleted, click 'Delete folder and all its contained files'.
- If you want to save the files that are currently in the folder, click 'Delete folder only and all files will be preserved'.
- Click Delete to confirm your selection.

