Procore Support (en-au)

Sign a Timesheet (iOS)

Also available on  android-gray-icon.jpg

Objective

To sign a timesheet in the project's Timesheet tool from your iOS mobile device.

Background

The Sign a Timesheet feature allows users on the Project level Timesheets tool to access the signature field and allow a company's employees to sign off on their time entries and confirm that their timecard information is accurate.

Things to Consider

  • Required User Permissions: 
    • 'Read Only' level permissions or higher the Company level Timecard tool.
  • Additional Information:
    • If changes are made to a signed time entry, an "Edit Timecard?" warning message will appear stating that the signature will be removed. The newly edited time entry will need to be re-signed by the employee. 

Prerequisites 

Steps

  1. Navigate to the project's Timesheets tool on your iOS mobile device.
  2. Navigate to the day you want to have a timesheet signed for.
  3. Tap the timesheet.
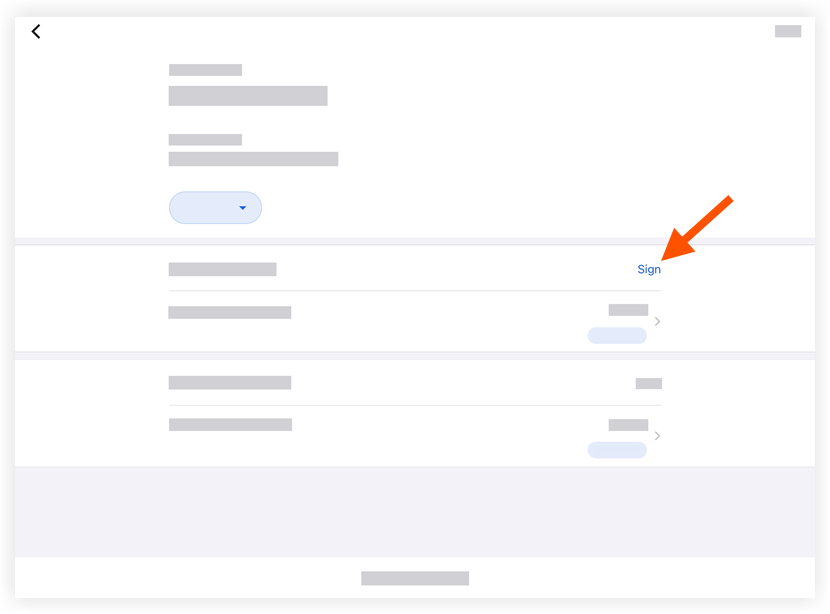
  4. Locate the timecard entry on the timesheet you would like the employee to sign.
  5. Tap Sign.

    timesheets-ios-sign-timesheet.png
     
  6. Pass the device to the employee who can now sign the timecard entry by dragging their finger above the signature line.

    timesheets-ios-sign-timesheet-window.png

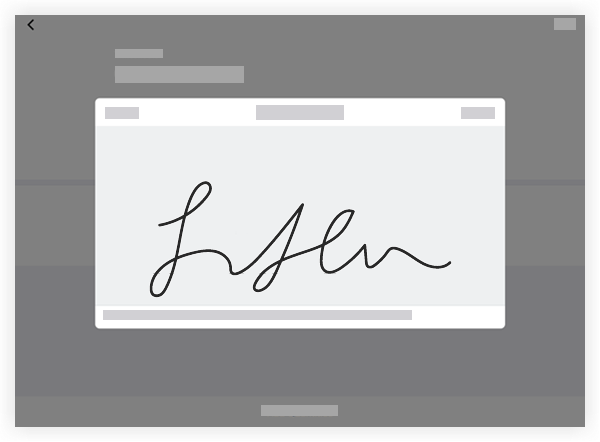
    Note: The text in the Signature field can be customised by an admin on the Company Admin tool. 
  7. Review the following before submitting the signature:
     Notes
    • Classification: Select from the drop-down menu the employee classification associated with the time entry. See Enable Classifications on a Project.
    • Sub Job: Select from the drop-down menu the sub job associated with the time entry.
    • *Cost Code: Tap to select the cost code associated with the time entry.
      Note: If you are an admin on the Company Admin tool, you can limit the cost code selections that appear in this list. To learn more, see Configure Advanced Settings: Company Level Timesheets.
    • Location: Tap to select from the drop-down menu the location where the work was performed by that user.
    • *Start Time: Tap to select the time the user began working.
    • *Stop Time: Tap to select the time the user stopped working.
      Note: You will only see the Start and Stop fields if you have configured your settings to show these fields. See Configure Advanced Settings: Project Level Timesheets.
    • Lunch Time: Select from the drop-down menu the amount of time taken for a lunch break. Select from the following options:
      Notes: 
      • The amount of time selected will be subtracted from the Total Time.
      • This field will only be available if Start Time and Stop Time is enabled.
        • 0 min (Default)
        • 30 min
        • 45 min
        • 60 min
    • Time Type: Select from the drop-down menu the type of pay being entered. Select from the following options:
      Note: If you are an admin on the Company Admin tool, you can add custom time types to this list. See Configure Advanced Settings: Company Level Timesheets for more information.
      • Regular Time
      • Double Time
      • Exempt
      • Holiday
      • Overtime
      • PTO
      • Salary
      • Holiday
    • Billable: Tap the toggle to indicate whether or not the entry is billable.
    • Description: Tap to enter additional comments that will show in the timecard entry.
  8. Tap Submit to approve and save the employee's signature.
    The signature will show at the bottom of the employee's timesheet entry.