Configure Single Sign-On in the Company Admin Tool
Objective
To configure Single Sign On (SSO) in the Company level Admin tool.
Background
Procore supports SP-initiated and IdP-initiated SSO with Okta, OneLogin and Microsoft Azure AD. See What is the difference between SP- and IdP-Initiated SSO? Procore also supports SSO with other service providers that are SAML 2.0 and SHA 256 compliant.
Things to Consider
- Required User Permissions:
- 'Admin' level permissions on the Company level Admin tool.
- 'Admin' level permissions on the Company level Admin tool.
- Additional Information:
- Please contact your SSO service provider if you need assistance locating the Issuer URL, Target URL, and x509 Certificate.
Prerequisites
- Configure the Procore application in your identity provider's SSO software or solution.
- Obtain the required SSO Settings from your identity provider's SSO software or solution.
Steps
- Navigate to the Company level Admin tool.
- Under 'Company Settings,' click Single Sign On Configuration.
Note: The data you enter on the page below is always obtained from the issuer (e.g. Okta, OneLogin or Microsoft Azure AD).Tip
See the links below for more detailed instructions about configuring SSO with Okta, OneLogin, Azure Active Directory and Google.
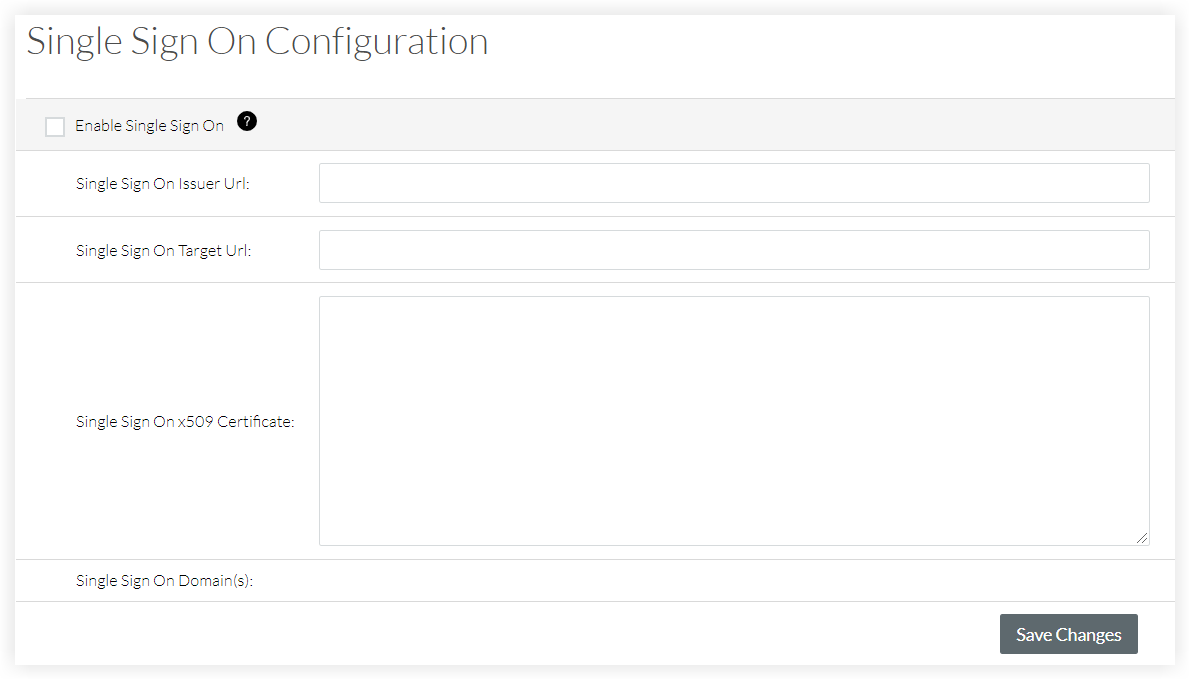
- Enter the Single Sign On Issuer URL. This is commonly referred to as the issuer and is a unique URL that identifies the provider issuing a SAML request.
- Enter the Single Sign On Target URL. This is the URL that will receive SAML requests from the provider.
- Enter the Single Sign On x509 Certificate. This is the encrypted digital certificate information.
- Click Save Changes.
- Reach out to Procore Support or your company's Procore point of contact to request to target the email domains of users who will be authenticating through SSO.
- After you receive confirmation that the SSO configuration is ready, mark the Enable Single Sign On checkbox on the 'Single Sign On Configuration' page.
- Click Save Changes.