Delete Configurable Fieldsets
Objective
To delete fieldsets from the Company level Admin page.
Background
A configurable fieldset is a group of fields in certain Procore tools that can be set to optional, required or hidden, depending on the needs of your company. This allows for better control over data entry when users create and edit items in Procore projects. See What are configurable fieldsets and which Procore tools support them?
You can delete a fieldset if you no longer want it to be available to apply to projects. However, you cannot delete a fieldset that is currently applied to projects or set as the project default. To remove fieldsets from projects, see Remove Configurable Fieldsets from Projects.
Things to Consider
- Required User Permissions:
- 'Admin' level permissions on the Company Admin tool.
- Additional Information:
- If you want to edit or rename a configurable fieldset instead, see Edit Configurable Fieldsets.
- To see which tools support configurable fieldsets, see What are configurable fieldsets and which Procore tools support them?
Warning
When you delete a configurable fieldset, it will be permanently deleted from Procore. Deleted configurable fieldsets are not recoverable.
Prerequisites
The fieldset must be removed from any applied projects before it can be deleted and cannot be set as the default for new projects. See Remove Configurable Fieldsets from Projects.
- Navigate to the Company level Admin tool.
- Under 'Tool Settings', click the tool you want to create configurable fieldsets for.
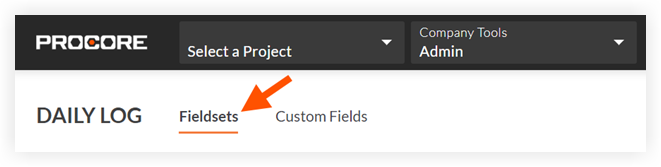
- Click the Fieldsets tab.
Note: Tools without other settings in the Company level Admin tool will open to this page automatically. - Click Create New across from the section you want to configure fieldsets for.
- In the 'Create Fieldset' window, enter a name for the fieldset and click Create.
- On the 'Edit Fieldset' page, each field name has the following options:
- Click the toggle to the ON
 position to make the field visible in the section.
OR
Click the toggle to the OFF position to hide the field in the section.
Note: A icon indicates that the field is visible by default and cannot be changed to hidden.
 - Mark the 'Required' checkbox to designate the field as required.
OR
Clear the 'Required' checkbox to designate the field as optional.
Notes:- Fields without a checkbox are optional by default and cannot be changed to required.
- A grey marked checkbox
 indicates that the field is required by default and cannot be changed to optional.
- Click the toggle to the ON
- Click Save.
- In the 'Apply changes to [#] project(s)?' window, click Assign Projects to add the fieldset to projects.
- In the 'Assign Projects' window, mark the checkbox next to each project you want to apply the fieldset to and click Update.
- In the 'Apply changes to [#] project(s)?' window, click Confirm.
- Optional: To set a fieldset as the default for new projects, click the
 icon at the end of its row on the 'Fieldsets' tab and select Set as New Project Default.
Note
Projects created from a project template that includes fieldsets will inherit the fieldsets from the project template instead of your company's default fieldsets. See Configure a Project Template.
Steps
- Navigate to the Company level Admin tool.
- Under 'Tool Settings', click the tool with the configurable fieldset that you want to remove.
- Click the Fieldsets tab.
Note: Tools without other settings in the Admin tool will open to this page automatically. - Click the
 icon across from the fieldset you want to delete.
Note: You can only delete the fieldset if it is not currently applied to any projects or set as the project default. - In the 'Delete [Fieldset Name]?' window, click Confirm.
Note: The fieldset cannot be restored once it is deleted.