Edit Project Group Information
Objective
To edit the information that appears on the landing page of one of the project groups in the company.
Background
After creating a new program (see Add Programs), use the steps below to add the program's details.
Things to Consider
- Required User Permission:
- 'Admin' level permissions on the company's Admin tool.
- Additional Information:
- To see which projects are assigned to the project group, click the "+" icon to the right of the project group name.
Demo
Steps
- Navigate to the company's Admin tool.
This reveals the Company Settings page. - Under Project Settings, click Defaults.
This opens the Project Settings page, which contains the Project Groups list. - Scroll down to the section called '
Project Groups' section. - Click Edit next to the desired project group.
This opens the Editing Project Group page. - Complete the following data entry as desired:
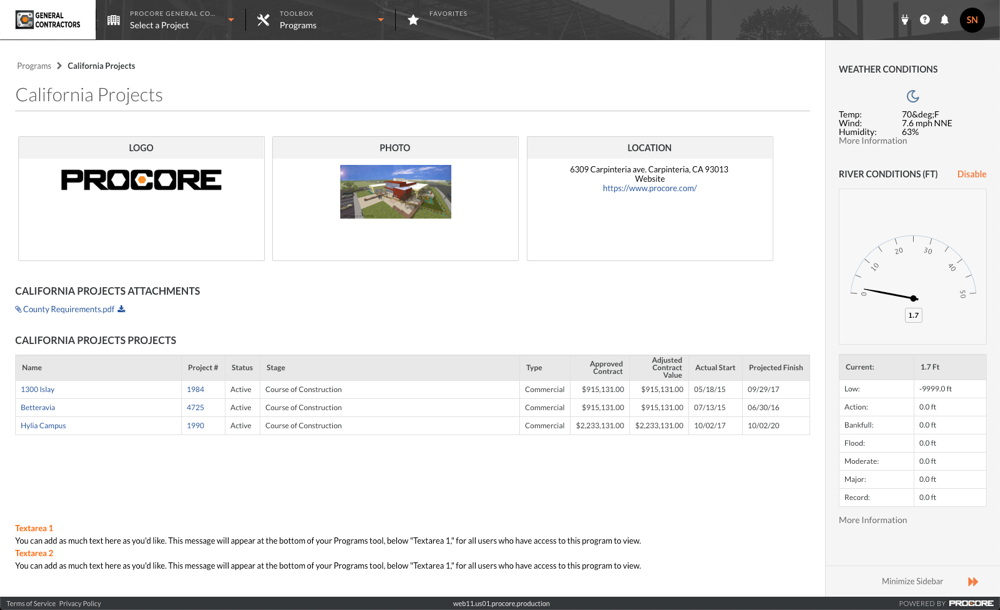
- Name. The title that you put into this field will appear at the top of the page in the Program's landing page, as well as on the Programs tool's landing page.
- Photo. Upload a photo to appear on the Project Groups tab.
- Logo. Upload a logo for the project group, if applicable. Similarly, you can also upload and use your company's logo instead. (Note: The logo must be in one of the following file formats: .png, .pdf, .jpg, .gif)
- Location. Add the location of the project group. You may add more than one location, if applicable.
- Website. If your company or project group has a related website, you can add a helpful hyperlink, which will appear under the project group's location information.
- Latitude/Longitude. The retrieved weather information is based upon the project group's specified latitude and longitude coordinates. Add the latitude and longitude coordinates here (e.g. 34.3).
- Postcode. Include the postcode that should be associated with the project group.
- iFrame URL. If you want to display part of a webpage in an iFrame, enter the URL of a webpage that you want to display. For example, you might want to a link to a live webcam feed, web portal, map view, aerial view, and so on. If you do NOT want to display a webpage in an iFrame, leave this field blank.
- iFrame Height. Specify the height (in pixels) of the iFrame that you want to display on the project group's page. The default value is 500px. If you do NOT want to display a webpage in an iFrame, enter 0.
- Textarea 1 and Textarea 2. Use these free-form text fields to add any additional details or notes.
- Attachments. Attach any files that apply to every project in the project group.
- Projects in the Program. Click the links to view the projects within the program. See Add Projects to a Program.
- Click Save Project Group.
- Repeat the steps above for each program.
When you open the page, a tile appears for each program. You can click a tile to open a page that shows all the projects associated with a program. The image below shows you what a program page looks like. In this example, we did NOT include an iFrame.