Upload Photos to the Site Diary
Objective
To upload photos to the Photos section of the Site Diary tool.
Background
Things to Consider
- Required User Permissions:
- 'Standard' or 'Admin' level permissions on the project's Site Diary tool.
AND
'Standard' or 'Admin' level permissions on the project's Photos tool.
- 'Standard' or 'Admin' level permissions on the project's Site Diary tool.
- Additional Information:
- Only Public photos can be added to the Photos section of the Site Diary tool. Photos added to the Site Diary can be viewed by anyone with access to the Photos tool
- If the project's Photos tool is configured to have photos set to private by default, you will not be able to upload photos to the Photos section of the Site Diary.
Important! The following settings in the Configure Advanced Settings page for the Photos tool must be disabled in order for photos to be added to the Site Diary tool using this method:- Clear the checkbox next to 'Make photos upload to the Photos tool private by default'.
Note: These settings can be managed by any user with 'Admin' permissions to the project's Photos tool.
- Clear the checkbox next to 'Make photos upload to the Photos tool private by default'.
- The photo album selected for the upload cannot be marked as Private.
- If you need to upload Private photos to a site diary, you can add them to entries from other sections of the Site Diary tool, such as the Notes register. See Create Note Entries.
- If the project's Photos tool is configured to have photos set to private by default, you will not be able to upload photos to the Photos section of the Site Diary.
- Tip! You can also add photos to the Site Diary tool while uploading photos to the Photos tool. See Upload Photos to the Site Diary from the Photos Tool.
- Only Public photos can be added to the Photos section of the Site Diary tool. Photos added to the Site Diary can be viewed by anyone with access to the Photos tool
Steps
- Navigate to the project's Site Diary tool.
- Scroll to the Photos section.
- Click Upload.
- Drag-and-drop the photos that you want to upload, or click Attach File(s) to select photos manually.
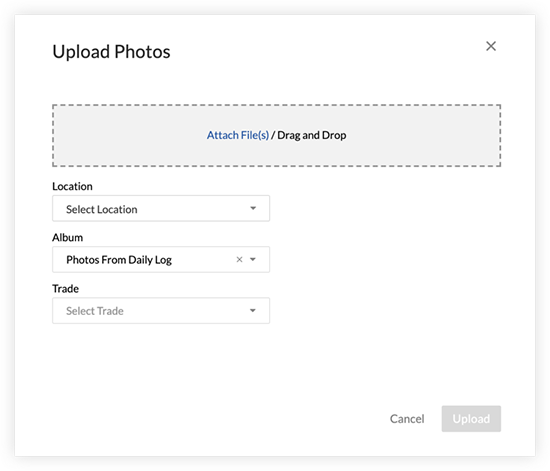
- Fill out the following information as necessary:
- Location: Select a location associated with the photos.
- Album: Select an album for the photos to be added to in the Photos tool.
Note: The album you select for the upload cannot be marked as Private, as only Public photos can be added to the Photos section of the Site Diary. - Trade: Select the trade associated with the photos.
- Click Upload.
Note: The photos are automatically added to the Photos section of the Site Diary and the specified album in the Photos tool.
If you would like to learn more about Procore's daily log management software and how it can help your business, please visit our construction daily log reporting software product page  .
.