Import a Funding Schedule of Values from a CSV File
Limited Release
 The Funding tool is available as a limited release for Procore customers in the United States who have implemented the Procore for Owners point-of-view dictionary. To learn more, see What tool names and terms are different in Procore for general contractors, owners, and specialty contractors?
Objective
To import a funding's Schedule of Values (SOV) from a CSV file.
Background
A Schedule of Values (SOV) is a list of line items that details all of the agreed-upon costs (for example, labour, materials and so on) on a project. Abbreviated as SOV, it itemizes the funding amount into individual pay items to show how the entire funding sum is allocated to all of the project's work. An SOV is also based on the project's approved budget and is commonly used to determine progress payments from the funding source to the owner.
Things to Consider
- Required User Permissions:
- 'Admin' level permissions on the project's Funding tool
- Additional Information:
- If the 'Enable Always Editable Schedule of Values' setting is turned OFF in the Funding Tool's Configure Settings page, the funding must be in the Draft status. This is Procore's default setting.
- If the 'Enable Always Editable Schedule of Values' setting is turned ON in the Funding Tool's Configure Settings page, the funding can be in any status. However, you cannot replace line items that have been progress claimd when performing an import. To learn more, see What is the 'Enable Always Editable Schedule of Values' setting?
Important
Before proceeding with the Steps below, always review the requirements for importing data from a CSV. See What are the requirements for importing SOV line items from CSV?
Prerequisites
- The funding must be in the Draft status. See Create Fundings or (Beta) Create Fundings.
Steps
- Customise the Delimiter & Download a Blank Template
- Add Line Items to the Blank Template
- Import the Complete Template to Procore
Customise the Delimiter & Download a Blank Template
- Navigate to the project's Funding tool.
- In the table, click the Number link for the funding to open.
- Click the Schedule of Values tab.
- At the bottom the Schedule of Values page, click Import SOV from CSV.
- In the Import Schedule of Values from CSV window, choose these options:
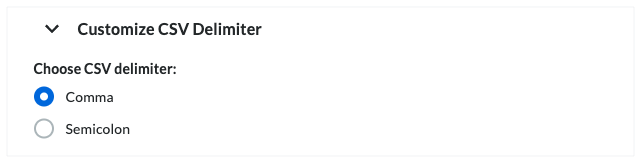
- Click Customise CSV Delimiter to reveal the options.
- Under Choose CSV Delimiter, choose one of these options:
Tip
What is a delimiter? A delimiter is a character used to separate values or text strings. It marks both the beginning and end of a unit of data.- Comma. Separates data using a comma (,). This is Procore's default option.
- Semicolon. Separates data using a semicolon (;).
- Click the Download Blank CSV Template button.
Procore downloads a blank template file named 'Subcontract SOV Template' the download location specified for your web browser.
Add Line Items to the Blank Template
- On your computer, open the template that you just downloaded.
- Follow one (1) of these steps to add line item(s) to your blank template:
Tip
Amount-Based Accounting Method
Unit/Quantity Based Accounting Method
Import the Completed CSV Template to Procore
- Navigate to the Head Contracts tool.
- In the table, click a Number link to open the contract.
- Under the General tab, click Schedule of Values.
- In the Schedule of Values card, click Edit.
This places the SOV into edit mode. - Below the table, click Import and choose SOV from CSV.
This opens the Import Schedule of Values from CSV window.

- Upload the file as follows:
- Click Upload File and select the completed template to upload.
OR - Drag-and-drop the completed template to the CSV File area.
- Click Upload File and select the completed template to upload.
- Depending on the state of your head contract, choose the appropriate option:
- To add more line items to the head contract, select Add Additional Line Items, then click Import.
- To replace all existing line items on the head contract with the template, select Replace Existing Line Items, then click Import.
Procore imports the template and displays a success banner. If you see an error message, click Show Error to learn why the import failed.