Enable the Payments Issued Tab for Invoicing
Objective
To enable the Payments Issued tab on a purchase order or subcontract to record the contract's outgoing payments.
Background
You can enable the 'Payments Issued' tab on a purchase order or a subcontract. As shown in the steps below, the controls in this tab give your project's users the ability to add new payment line items for a purchase order or subcontract. It also provides a convenient list that summarises all of the payments issued on project.
Things to Consider
- Required User Permissions:
- You must be an progress claim administrator.
Prerequisites
Steps
- Navigate to the project's Invoicing tool.
- Under the Subcontractor tab, click the link in the Commitment column to select the commitment that you want to work with.
- Click the Advanced Settings tab.
Note: Depending on the size of your browser window, this tab may be listed as an option in the More menu. - Click Edit on the right-hand side of the screen.
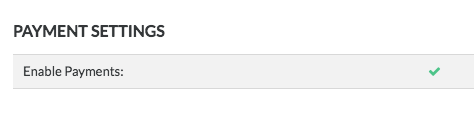
- Scroll to Payment Settings.
- Place a mark in the Enable Payments check box.
- Click Save.
If you would like to learn more about Procore's invoice management software and how it can help your business, please visit our construction invoice management software product page  .
.