Manage Rows and Columns on a Subcontractor Progress Claim's Schedule of Values
For Procore Customers in the United States
 When your company applies the 'Owners English' or 'Specialty Contractors English' point-of-view dictionary, you'll see different tool names and term changes in the user interface. Learn how to apply the dictionary options.
- To learn the differences: Show/Hide
Objective
To manage the rows and columns in a subcontractor progress claim's Schedule of Values.
Background
If you want to show, hide, group, sort or size the columns in the 'Schedule of Values' table in the project's Commitments tool, there are a variety of operations you can use to organise the line items on your progress claims.
Things to Consider
Prerequisites
Steps
Group by Menu
A Group by menu is available when viewing and editing a progress claim's Schedule of Values. With these options, you can choose how the system groups your line items in the Schedule of Values. By default, the Commitment Lines and Variations option is selected. You can add and remove any additional options as desired.
Tip
How do I show/hide columns that I've selected as grouping options? When you add an option to the Group By menu, Procore automatically adds the column to the right side of the table, unless that column is already configured to show in the Schedule of Values. To show or hide columns, apply the ON/OFF controls described in Configure Columns.To organise your Schedule of Values data, you can click the grab bar on the left side of each option (see 1 and 2 below) and drag the option into the desired position to modify the hierarchy of item groupings in the SOV table. To remove any options from the progress claim, click the close (x) icon next to a single option or simply click Reset.

When applying the menu options, its important to note that the groupings in the Schedule of Values do NOT impact the layout of the progress claim's PDF export files. Any settings you apply to one contract's progress claim, do not change the settings on another contract's progress claims. However, any options you set do remain in effect between user sessions on the selected contract's progress claims.
Bulk Edit a Schedule of Values
You can bulk edit the percentage values to apply to selected line items on a subcontractor progress claim's Schedule of Values. To open the Edit panel, select the line items and then click the Pencil icon. The fields in the Edit panel are available when you update the latest progress claim for a commitment. The bulk editing options detailed in the table below are only available when a progress claim is in the Draft or Revise & Resubmit status. Any options you set will remain in effect between user sessions on the commitment contract's progress claims.

The first step is to select one (1) or multiple line items using the options illustrated above. The following table describes your options in more detail.
| What do you want to select? | Steps | Example |
|---|---|---|
| All line items in the Schedule of Values | Mark the Item Number checkbox at the top of the Schedule of Values. |  |
| All line items in a group | Mark the check box(es) at the top of the desired group(s) in the Schedule of Values table. |  |
| One or multiple line items | Mark the check box(es) that correspond to individual line item(s) in the Schedule of Values. |  |
The next step is to click the pencil icon at the top of Schedule of Values to open the Edit panel on the right.
The final step is to edit one (1) or all of the values in the fields described in this table:
| Field Name in the Edit Panel | To edit the selected line items... | To apply your edits... | Learn More |
|---|---|---|---|
|
Work Completed This Period (%) |
Type a percentage value to bill for work complete. | After updating the field(s) the Edit panel, click the Apply button. | Create a Subcontractor Progress Claim |
|
Total Completed & Stored to Date (%) |
Type a percentage value to bill for work complete. | ||
| Work Retention This Period (%) | Type a percentage value to set work retention. | Set or Release Retention on a Subcontractor Progress Claim | |
| Retention Released (%) | Type a percentage value to release retention. | ||
| Materials Retention (%) | Type a percentage value to set materials retention. |
Manage Table Settings
You can adjust row height and show/hide columns using the Table Settings options in the Schedule of Values. First, click the Table Settings ![]() icon on the top-right side of the SOV table. This reveals the Table Settings pane on the right side of the web page. To close the Table Settings pane, click the 'x' in the top-right corner.
icon on the top-right side of the SOV table. This reveals the Table Settings pane on the right side of the web page. To close the Table Settings pane, click the 'x' in the top-right corner.

Row Height
Under Row Height, choose the Small, Medium or Large option button. Procore's default setting is Medium.

Configure Columns
To choose the columns to show and hide, click the Table Settings ![]() icon on the top-right side of the contracts table. This reveals the Table Settings pane on the right side of the web page. Under the Configure Columns area, move the toggle to the right to turn the column display ON. Procore's default setting is to show all available columns.
icon on the top-right side of the contracts table. This reveals the Table Settings pane on the right side of the web page. Under the Configure Columns area, move the toggle to the right to turn the column display ON. Procore's default setting is to show all available columns.
Notes
- The blank line at the top of the 'Configure Columns' list is used to turn the 'Grand Totals' on the SOV table ON and OFF.
- By default, all of the available columns on a progress claim are turned ON.

Other options in the Table Settings area include:
- To hide a specific column, move the toggle to the left.
- To show a specific column, move the toggle to the right.
- To restore Procore's default column settings, click the Reset to Default link.
Manage Columns
Adjust Column Width
To adjust the width of a single column, hover your cursor over the right border of a column heading until the resize handle ![]() icon appears. Then drag the handle to the left or right to set the desired column width. If you press the SHIFT key while holding down the resize handle, a blue outline appears over the active column to help you see your column adjustment.
icon appears. Then drag the handle to the left or right to set the desired column width. If you press the SHIFT key while holding down the resize handle, a blue outline appears over the active column to help you see your column adjustment.

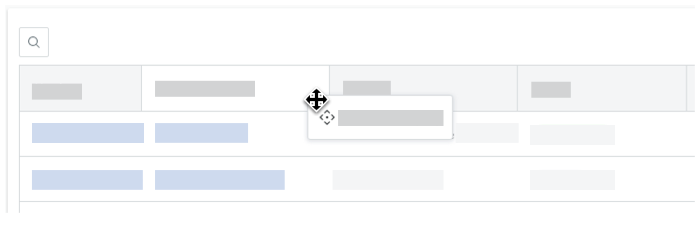
Arrange Columns
To move a column to another position in the table, click and hold the desired column's heading. Then use a drag-and-drop operation to place in the position you want.
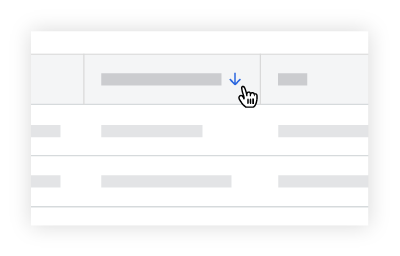
Sort Columns
To sort the table's data by a specific column, click any column heading to reveal a BLUE arrow to adjust the sort order of the table.
| Icon | Sort Order | Additional Information |
|---|---|---|
| Ascending | To reset your columns, hover your cursor over the right side of a column heading until the vertical ellipsis |
|
| Descending |
Overflow Menu
To open a drop-down menu with additional column options, hover your cursor over the right side of a column heading until a vertical ellipsis ![]() appears. Then click the vertical ellipsis
appears. Then click the vertical ellipsis ![]() to reveal an Overflow menu with the additional options. The options are pictured below.
to reveal an Overflow menu with the additional options. The options are pictured below.

Group By Column
All columns contain an 'Group By' option in the Overflow menu. This lets you group the table's data by the column you select.

Column Grouping Options
Simply hover your mouse cursor over one of these columns until the vertical ellipsis ![]() for the Overflow menu appears. Then click the ellipsis and select the column Group By option. You can also apply multiple grouping options to your table by selecting the same option on other columns.
for the Overflow menu appears. Then click the ellipsis and select the column Group By option. You can also apply multiple grouping options to your table by selecting the same option on other columns.
Pin Column
To keep data columns in the Contracts table from moving when you scroll, you can pin a column to freeze it in place. To do this, hover your cursor over the right side of a column heading unit the vertical ellipsis ![]() appears. Next, click the vertical ellipsis
appears. Next, click the vertical ellipsis ![]() and choose Pin Column. Then choose one of these options:
and choose Pin Column. Then choose one of these options:
- To pin a column on the left side of the table, choose Pin Left.
- To pin a column on the left side of the table, choose Pin Right.
Tip
- Procore pins columns to the left or right side of the page in the order columns are pinned.
- You can rearrange your pinned columns by dragging and dropping a column into the desired position.
- You can pin columns to both the left and right side of the table.
- To remove all pins, choose No Pin.
Autosize this Column
To automatically set the width of a column to match its contents, hover your cursor over the right side of a column heading until the vertical ellipsis ![]() appears. Then click the vertical ellipsis
appears. Then click the vertical ellipsis ![]() and select the Autosize This Column option from the drop-down menu.
and select the Autosize This Column option from the drop-down menu.
Autosize All Columns
To automatically set the width of all columns in the table to best match the contents, hover your cursor over the right side of a column heading until the vertical ellipsis ![]() appears. Then click the vertical ellipsis
appears. Then click the vertical ellipsis ![]() and select the Autosize All Columns option from the drop-down menu.
and select the Autosize All Columns option from the drop-down menu.
Reset Columns
To reset the table's columns to Procore's default settings, hover your cursor over the right side of a column heading until the vertical ellipsis ![]() appears. Then click the vertical ellipsis
appears. Then click the vertical ellipsis ![]() and select the Reset Columns option from the drop-down menu. This resets all of your column settings to Procore's default settings.
and select the Reset Columns option from the drop-down menu. This resets all of your column settings to Procore's default settings.