Add a New Payment to the Payments Issued Tab of a Commitment
Important
Author note: Log all Invoicing & Pay changes in: https://procoretech.atlassian.net/browse/ILR-469PROCORE SUPPORT: INTERNAL NOTES
This page details the modernised experience of the Commitments tool. A tutorial for the legacy experience is available in the Commitments tool at this link: https://support.procore.com/products...n-a-commitment
For Procore Customers in the United States
 When your company applies the 'Owners English' or 'Specialty Contractors English' point-of-view dictionary, you'll see different tool names and term changes in the user interface. Learn how to apply the dictionary options.
- To learn the differences: Show/Hide
Objective
To manually record any payments your company issues for a commitment as an progress claim administrator.
Background
To manually record any payments issued to the downstream collaborator on a commitment, use the 'Payments Issued' tab on the commitment.
- For companies using Procore Pay: Show/Hide
- To learn about the required settings to accurately track and manage joint check payments when using Procore Pay to pay subcontractor progress claims, read About Joint Checks with Procore Pay.
Things to Consider
Prerequisites
Steps
- Navigate to the project's Invoicing tool.
- Click the Subcontractor tab.
- Locate the contract or progress claim for the new payment record.
- Choose from these options to open the commitment.
- Contract. Click the Contract link to open the commitment.
- Progress Claim #. Click the Progress Claim # link and then click the Contract # breadcrumb link.
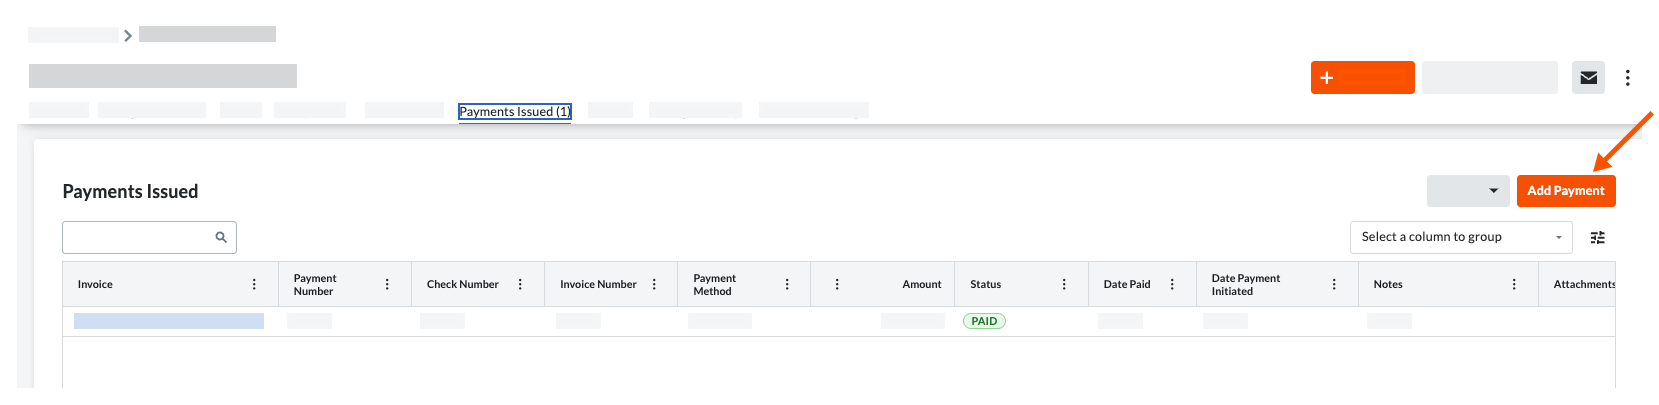
- In the commitment, click the Payments Issued tab.
- Click Add Payment.
- In the Add Payment prompt, enter:
- Progress Claim. Select an existing progress claim from the drop-down that the issued payment is attached to.
- Payment #. Enter the related payment number for the issued payment.
- Payment Method. Select a payment method from the drop-down list: Check, Credit Card, and Electronic.
- Amount. Enter the amount of the payment.
- Date. Enter the issue date for the payment
- Progress Claim #. Enter the related progress claim number for the payment issued.
- Check #. Enter the related check number for the payment issued.
- Notes. Enter any additional notes regarding the issued payment for record purposes.
- Attachments. Attach any relevant files or documents.
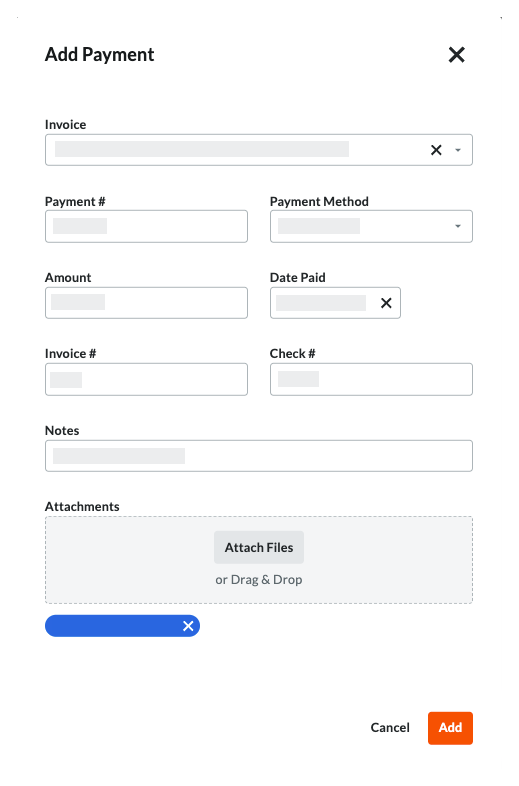
- Click Add.
If you would like to learn more about Procore's invoice management software and how it can help your business, please visit our construction invoice management software product page  .
.